EasyDD: write image file to drive
EasyDD is an application for writing an operating system image file to a drive. Typically, this might be something like writing file 'debian-1.2.3.img.gz' (for example) to an SD-card for a RaspberryPi board, to a USB-stick for a desktop PC or laptop, or for any other board or computer.
EasyDD is a simple bash script, capable of running in either CLI (commandline) mode or GUI (graphical) mode.
In CLI mode it will run on any Linux OS, as it only uses utilities
such as 'grep', 'sed', 'dd' and 'gunzip', available on even the most
cut-down Linux distribution.
GUI mode, however, requires 'gtkdialog', which is an executable that scripts use to provide GUI
windows. Gtkdialog is in all Puppy Linux, Fatdog, EasyOS, and
all Puppy-derivatives, but may not be in some other Linux distributions.
There is no problem with using EasyDD in CLI mode, in fact that is
the author's preferred mode. If you are running some Linux
distribution other than a Puppy-derivative, and 'gtkdialog' is not available, you should be fine to run EasyDD in CLI mode.
EasyDD script download and usage
EasyOS and EasyPup already have it, at /usr/sbin/easydd. For everyone else, download it from here:
https://bkhome.org/files/easydd.gz
Open a terminal window at the same folder where you downloaded the image file, if not already.
Then, download easydd.gz to the same folder, and run this;
# gunzip easydd.gz
# chmod 755 easydd
...the first line uncompresses the file, the second line makes it
executable. Let's say the image is 'debian-1.2.3.img.gz', so do this:
# ./easydd debian-1.2.3.img.gz
...of course, you could copy easydd to /usr/sbin, so it will be in the $PATH.
That's it, easy-peasy. There will be some simple questions, and the
image will get written to the drive. Now for a very important point, why
the author recommends EasyDD instead of Etcher and some other tools:
EasyDD does not uncompress the image file before writing it to the drive (which Etcher does). Instead, the file is uncompressed directly to the drive. This is important in memory-constrained systems, as there is no huge intermediate uncompressed file.
Yes, easy-peasy to use, but it might be helpful to see an overview of usage details...
Usage details
Here is a table that summarizes the commandline options:
| # easydd | GUI | No parameters, runs in GUI mode |
| # easydd <file> | CLI | image-file parameter, will ask for target-drive |
| # easydd <file> <drive> | CLI | image-file and target-drive parameters |
| # easydd -h | CLI | Prints help info. Long option "--help" |
You could put an entry in the menu, or a link on the desktop, of
whatever Linux distro you are using, then just click to open EasyDD in
GUI mode. You then get nice windows to guide you through the write
operation. Here is the first:
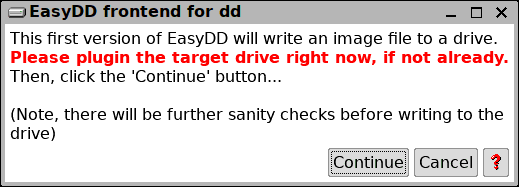
After clicking the "Continue" button:
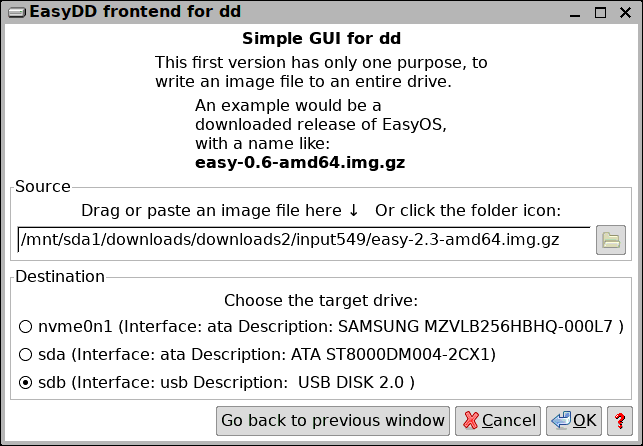
...very simple. In the above snapshot, the image file easy-2.3-amd64.img.gz has been dragged into the source-box. Notice the "?" icon, clicking that brings up a help window:
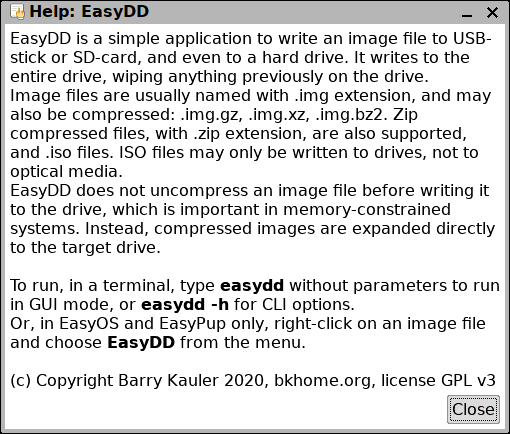
...yep, ZIP and ISO files are also supported.
Note the comment about right-click menu in the above snapshot. Yes,
that is a convenient feature, but only when running EasyOS or EasyPup:
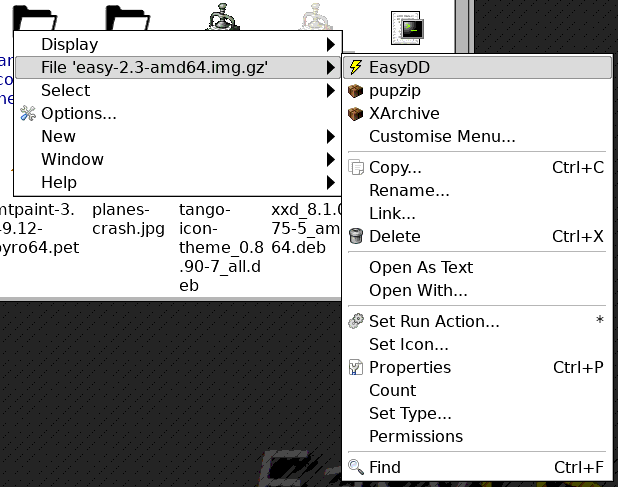
...well, it should be possible to setup other file managers to do the
same thing. It brings up EasyDD in GUI mode, so requires gtkdialog.
There is a final sanity-check before committing to writing:
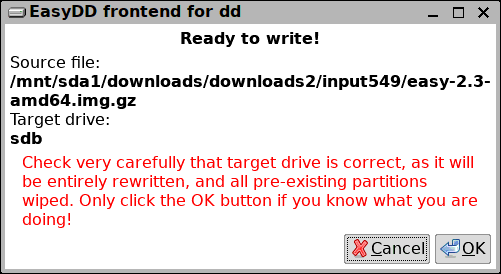
Click "OK", and the write begins:

...notice the "3.9 MB/s"! The author used an old cheap USB-stick.
Such a slow drive is not recommended. For running an operating system from USB-stick or SD-card, at least 7MB/s is recommended. You can readily buy much faster (and more reliable) USB-sticks. "Sandisk Ultra" for example, or at the upper extremity there is the "Sandisk Extreme" which writes at about 150MB/s. You can also use an SSD.
That's it, the drive is ready to be booted from. Enabling bootup from
a USB-stick, USB-SSD, USB-HDD, SD-card, or even if you used EasyDD to
write to an internal drive, depends on what board it is, for example a
RaspberryPi3 board, or the type of desktop PC or laptop. For a PC, you
might find this page useful:
https://easyos.org/install/prepare-your-computer-for-booting-linux.html
But there is plenty of other information available on the Internet.
You may, for example, already have GRUB installed, so it may be
necessary to create a new menu entry.
Barry has tested on EasyOS, with very limited testing on EasyPup,
Quirky, Puppy, and Linux Mint Cinnamon, latter in CLI mode only. See the
disclaimer below.
Have fun!
Barry Kauler is the author of this page, and the creator of EasyDD. This page must not be reproduced elsewhere, only linked-to.
Disclaimer: Barry has created EasyDD in
good faith, however no liability is accepted. You use EasyDD with the
understanding that you accept all liability for it's behaviour.
Tags: linux
