
TreeHugger 1P tarp Mark-2
Complete instructions for Mark-1 tarp are here:
https://bkhome.org/light/treehugger-1p-tarp-weighs-only-178g.html
Mark-1 was a learning experience, and hopefully Mark-2 will be pretty much what I want as the final product.
The original concept was to have a 25mm carbon fibre spreader-bar
just above head-height, to give more head room. I was a bit nervous
about how that would complicate the design and how the sides would hang,
so Mark-1 does not have the spreader-bar.
With Mark-2, decided to "go for it" and construct as per the original
concept, even though haven't quite figured out some details for
affixing the spreader-bar.
This time, I am using 10D silnylon purchased via Aliexpress, from Rex Outdoors:
https://www.aliexpress.com/item/32625219053.html
Rex Outdoors only ships by China Post, which is very slow. Not sure,
think that it took about 2 months to reach my doorstep in Australia.
Construction proceeded as per the Mark-1, this time with slightly different dimensions:
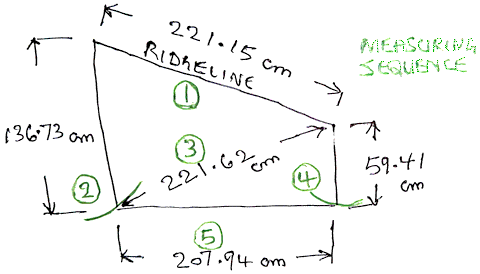
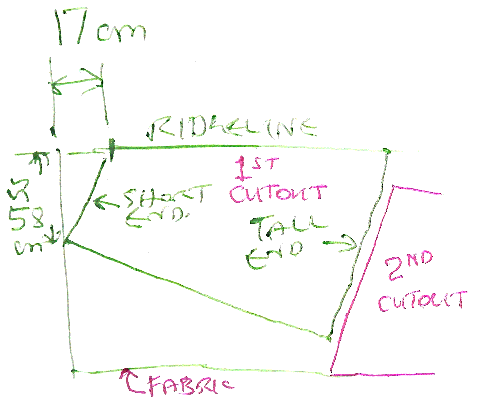
4.8 metres of fabric is required, and the 2 pieces can be cutout efficiently like this:
So, had 2 pieces, and together they weigh 133g. It will be very
interesting to calculate the weight of the fabric in grams per square
metre. From SolveSpace, the bottom-left angle is 87.3 degrees and
top-right is 74.96 degrees, on the top image above. Then can calculate
the area:
https://keisan.casio.com/exec/system/1322718508
Gives the 2 pieces 4.08 metre squared, which calculates to 32.6gsm.
Very interesting! The photo on the Rex Outdoor page states 28gsm, then further down they have 30gsm.
I really do need a reference weight to test the accuracy of my digital scale. It is only a cheap one from Kmart.
Note, I suspect that the manufacturer and vendor are just stretching
the truth a little bit, by including the border of the fabric in the
area calculation. Only suspect, not verified! There is roughly 1 inch
along both sides of the fabric that are not silicone-impregnated, thus
lighter. That's why, in the photo below, you can see the ridgeline of
the first piece placed about 1 inch from edge of the fabric, because
that is going to be cut off.
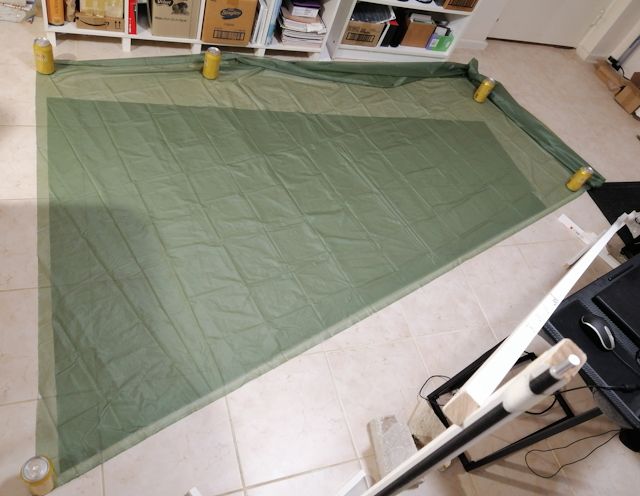
Marking out this fabric has proved to be even more of a challenge
than the previous fabric used in the Mark-1 tarp. This stuff is very
translucent. Here is a photo showing the first cutout laid on the fabric
to use as a template to mark-out the second piece:
For Mark-1, I used these fabric-marking pencils:
However, with this green fabric it is difficult to see the line. With
Mark-1, I was pressing the pencil a bit too firmly onto the fabric and I
was worried that it might be damaging the delicate fabric.
I have experimented with other markers. On the forums, the Sharpie
metallic silver permanent marker pen is highly recommended. However, I
think that it is unsuitable for a couple of reasons.
Firstly, it remains highly visible through the translucent fabric.
Secondly, it may compromise the silicone glueing -- I have no idea how
well the silicone adhesive will stick to it.
I also tried chalk, but when ran a bead of adhesive along with the
finger, while glueing a hem, it also erased the chalk line. So I could
not see where to fold the hem over to, and had to estimate it visually ,
which was not satisfactory.
Actually, I did use the Sharpie pen to mark-out the two pieces, as the marked line was outside where cut with the scissors.
WARNING: At first, I bought Anko brand metallic marker pens from Kmart, as the Sharpie brand was out of stock. This is Kmart's own brand. Useless, they kept on blocking up. Initially, after some effort, they did flow OK for awhile, but they rapidly degenerated, and after a few uses they were unusable. Later, I bought Sharpie metallic pens from Woolworths, a set of three including silver -- they work great!
Note, the Sharpie pens I bought are fine-point, which are OK, but apparently there are ultra-fine available, which would be even better I reckon (Woolworths only stock the fine point).
For the hems, I went back to the Semco pencils. To make the line more
visible, needed something dark underneath. This was the only dark
fabric I had available:
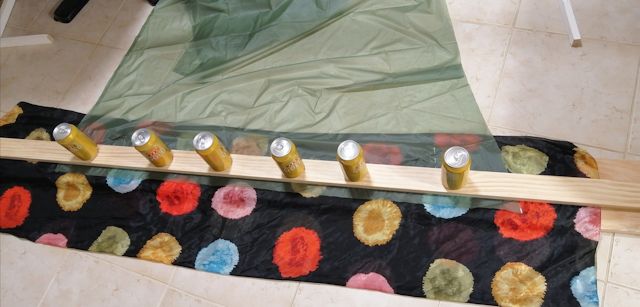
...the photo shows a length of wood being used as a ruler for the marker pencil. I took care to press the pencil lightly.
Running a bead of adhesive along with the finger does still partly
erase the marked line, but enough remained for me to just make out where
to fold the hem.
EDIT 2021-06-22:
Hmmm, no, not so good. Sometimes the marked line is completely gone. As had pressed lightly with the
pencil, it gets erased when spread the adhesive with the finger. I
think that it is chalk-based, and the particles get swept away.
Struggled through with the hems, but when got to the ridgeline, tried this...
I don't need a continuous line, just
periodic visual cues showing where the other piece of fabric is to be
pulled onto overlap the underneath piece. To achieve this, I drew
arrows, about every 6 inches:
![]()
Yes, this works. Even if the tip of the arrow
gets swept away, I can still see where it is pointing to. In the photo,
you can see the other piece of fabric at the bottom, the edge of which
has to be pulled up to the marked line. Overlap is 3cm.
EDIT 2021-07-25:
For the record, appending this extra note about marking-out and glueing.
I am now using a chalk bar (purchased at Spotlight) to do the line
marking, and aluminium channel to spread the adhesive. This spreads
without wiping out the marked line, so the above suggestion to use
arrows is not required. This technique with aluminium channel spreader
is described in a later blog post:
https://bkhome.org/news/202106/refinements-to-glueing-tarp.html
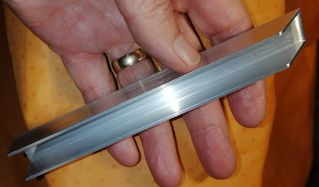
...an extra note to add, is now overlapping the
ridgeline by only 20mm, and for that using a spreader made from
20x20x1.5mm aluminium channel.
Tags: light