Tentative first step framebuffer with LittleVGL
As posted earlier today, I have started to evaluate LittlevGL:
http://bkhome.org/news/201808/first-go-at-evaluating-littlevgl.html
the "PC simulator" does look like a good starting point, though it is
setup to create a binary named "demo" that is linked against SDL2.
That's OK for learning, but I am aiming to talk directly to the Linux
framebuffer.
For EasyOS, SDL2 packages are available here (libsdl2-*):
http://distro.ibiblio.org/easyos/amd64/packages/compat/oe/pyro/
Download the pc-simulator zip file:
https://littlevgl.com/download
Direct link to version 5.1.1:
https://littlevgl.com/download/pc_simulator_v5_1_1.zip
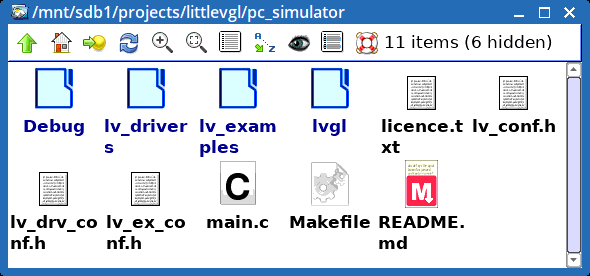
Expand the zip file, and this is what you see:

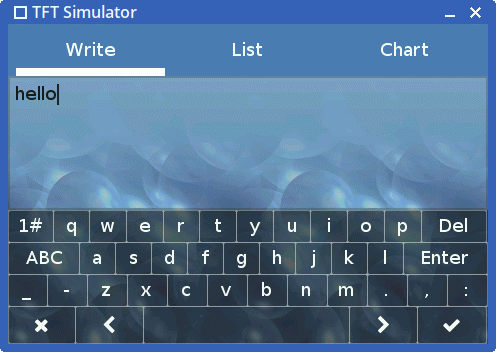
Open a terminal, and type "make". That's it, a binary named "demo" will be created. Run it "# ./demo", and you get a GUI:

There is another tutorial web page that explains how to create a simple
"Hello World" app using the Linux framebuffere, so onto that...
Hello World with Linux framebuffer
There is an introduction and tutorial here:
https://littlevgl.com/blog/23/embedded-gui-using-linux-frame-buffer-device-with-littlevgl
I fiddled around for awhile. Like the "PC Simulator" tutorial page, there is a conceptual-gap in the instructions. Here:
2. Compile the code and go back to character terminal mode
...er, how to compile it? For a beginner, this is an awkward step. A Makefile is needed. These are the steps that I followed:
- Run "make clean"
- In the 'pc-simulator' folder, I moved 'lv-conf.h', 'lv_drv_conf.h', 'lv_ex_conf.h', 'main.c' and 'Makefile' elsewhere.
- I then created new 'lv_drv.h', 'lv_conf.h' and 'main.c' as per instructions in the above URL.
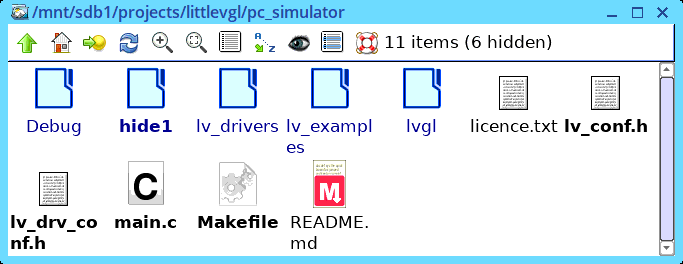
- I copied-back the 'Makefile' that I had previously moved away, and
edited it. Snapshot of the files, 'hide1' is where I moved the original
files to:

Here is my edited Makefile:
#
# Makefile
#
CC = gcc
CFLAGS = -Wall -Wshadow -Wundef -Wmaybe-uninitialized
CFLAGS += -O3 -g3 -I./
#LDFLAGS += -lSDL2 -lm
BIN = demo
VPATH =

LVGL_DIR = ${shell pwd}

MAINSRC = main.c

#LIBRARIES
include ./lvgl/lv_core/lv_core.mk
include ./lvgl/lv_hal/lv_hal.mk
include ./lvgl/lv_objx/lv_objx.mk
include ./lvgl/lv_misc/lv_fonts/lv_fonts.mk
include ./lvgl/lv_misc/lv_misc.mk
include ./lvgl/lv_themes/lv_themes.mk
include ./lvgl/lv_draw/lv_draw.mk

#DRIVERS
include ./lv_drivers/display/display.mk
include ./lv_drivers/indev/indev.mk

OBJEXT ?= .o

AOBJS = $(ASRCS:.S=$(OBJEXT))
COBJS = $(CSRCS:.c=$(OBJEXT))

MAINOBJ = $(MAINSRC:.c=$(OBJEXT))

SRCS = $(ASRCS) $(CSRCS) $(MAINSRC)
OBJS = $(AOBJS) $(COBJS)

## MAINOBJ -> OBJFILES

all: clean default

%.o: %.c
	@$(CC)  $(CFLAGS) -c $< -o $@
	@echo "CC $<"

default: $(AOBJS) $(COBJS) $(MAINOBJ)
	$(CC) -o $(BIN) $(MAINOBJ) $(AOBJS) $(COBJS) $(LDFLAGS)

clean:
	rm -f $(BIN) $(AOBJS) $(COBJS) $(MAINOBJ)
I do realise that more modules than are needed, are being included in
the build, but that's OK, as I plan to play with adding more widgets.
Notice that SDL2 is not being linked.
Run "make", it creates 'demo'. This will not run on the Xorg desktop,
though I vaguely recall a method of doing it in a terminal. Anyway, the
way to test 'demo' is to exit from X, via the Shutdown menu in EasyOS
(and most pups). Then, on the commandline, as long as a framebuffer has
command of the screen, which is likely (there are some caveats), just
execute 'demo', where-ever it is.
On the commandline, here is what it looks like:

That's as far as I've got. Next, need to investigate mouse support...
LVGL evaluation Part-3 here:
http://bkhome.org/news/201808/littlevgl-evaluation-part-3.html
Tags: linux
