
Tarp glueing hems and ridgeline
Continuing the project constructing TreeHugger 1P mark-1 tarp, a simpler design than originally conceived. Previous post:
https://bkhome.org/news/202105/th1p-mark-1-simple-tarp.html
I decided to glue the entire tarp, and only sew the tie-out webbing.
Really want to find out if an almost-totally glued tarp will be strong
enough. Of course, it very much depends on the weather conditions in
which it is going to be used. I am in Western Australia, Mediterranean
climate, but there will be some high winds on the South Coast. Unlikely
to ever use it in "gale force" winds.
The tarp consists of two pieces, that will be glued together at the
ridgeline. This stage of the project started with getting together
support items:
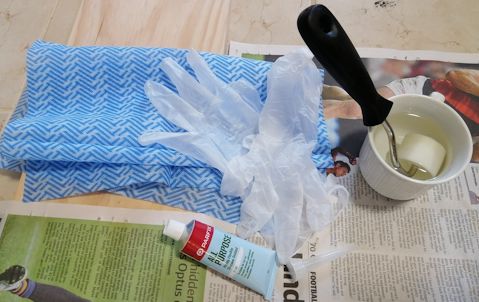
The idea of the roller is to run it over the seam, to ensure both
surfaces are pressed into the adhesive. I purchased this 30mm Seam
Roller from Bunnings:
https://www.bunnings.com.au/uni-pro-30mm-seam-roller_p1662302
The Parfix All Purpose Silicone Sealant is also from Bunnings, a small 40g tube:
https://www.bunnings.com.au/parfix-40g-clear-all-purpose-silicone_p1230047
I reckoned that it would be easier to handle a small tube, rather than a large 300g tube with dispenser.
The roller is in a cup with mineral turpentine, the idea being to clean any silicone off it. The gloves are vinyl disposable.
The sides and bottoms of the tarp are just simple folded-over hems.
What I did was lay the fabric over a dressed-pine plank, with some
weights to keep it in place:
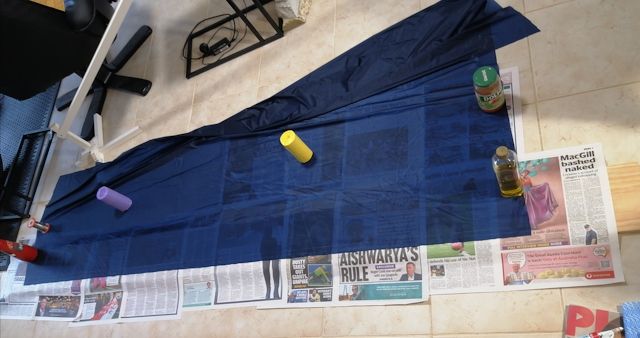
And used the marking pencil to draw two lines, 1.5cm apart:
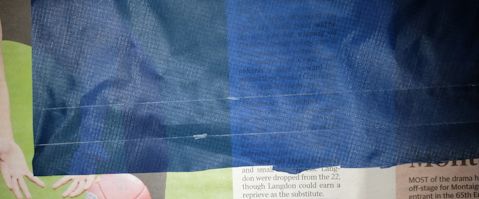
...oh, you can see my awful cutting of the edge! That was a
particularly bad spot, lack of concentration. Probably a roller-cutter
would do a straight line, or a soldering iron.
What is to happen here, is first adhesive is spread between the two
lines, then the edge is folded over. Seems simple enough in theory, and
in practice wasn't that difficult.
I am left-handed, so it seemed most natural for me to start from the
right side, and use the left hand to apply the adhesive, then spread it
with a thumb or finger of the left hand. I dribbled a very thin line of
adhesive between the two lines, then with one sweep of the thumb, held
sideways, spread the adhesive into a thin film, hopefully filling the
entire space between the two lines.
I did it a section at a time, using the newspaper edges as convenient stopping-points.
This spreading operation has to be done in one go. Going back and
trying to spread it around can end up in a mess. As I was very miserly
with applying the adhesive, it didn't always spread out to 1.5cm. But
for the hem, I think that is non-critical.
I waited several hours between doing each hem, then finally got to doing the ridgeline...
I first spread cling-wrap over the wood plank. Reason is, cling-wrap
is made with polyethylene, which silicone does not stick to. I have
cheap Woolworths brand cling-wrap, and it doesn't say on the packet what
it is made with, but I tested, and confirmed silicone sealant doesn't
stick.
I marked a line 3cm from the edge, then lay the other ridgeline on top. So, 3cm overlap.
Now for the tricky bit, how to glue this without the two pieces moving all over the place...
With the two pieces of fabric in place, I put a lot more weights here
and there, so that if the edge of the top fabric is lifted, when let
go, it will naturally fall back into the same place.
A problem with silnylon is that it is stretchy, particularly this
thin stuff. So you can't pull it. It really has to be as much as
possible placed so that the upper edge will just fall down in the
correct place. You can lower it with some encouragement to meet the edge
with the chalk-line, but do not pull the fabric longitudinally -- we do
not want the top piece stretched when the bottom piece isn't.
Due to the 3cm width, I applied the adhesive in a zigzag pattern,
then used the side of my index finger (finger closest to the thumb) to
spread it. As with the hem, I did a small section at a time.
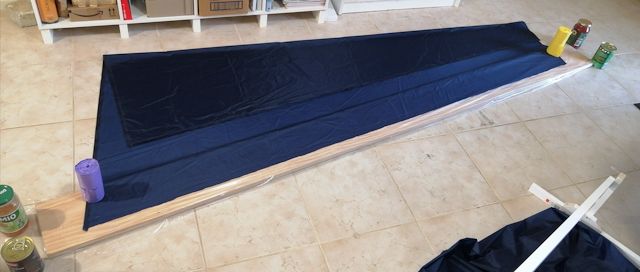
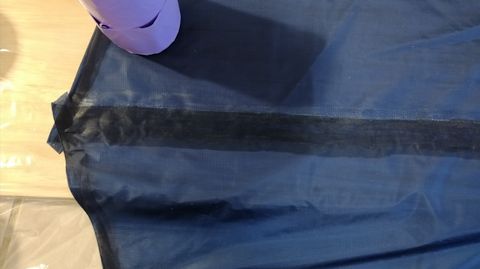
The ridgeline turned out OK, except that I was too miserly in
administering the adhesive. Wasn't quite getting 3cm spread in some
places. I measured afterward, only use 4g adhesive in the ridgeline,
much less than anticipated. What I will do later on. is go back over the
edges that are not fully stuck down, apply more adhesive.
Here is what the ridgeline looks like:
Now for measuring the weight...
The two pieces of silnylon weigh 128g. After glueing the hems and ridgeline, total weight is 144g. Oh man, that is light!
What is going to be very interesting is how much weight the tie-outs
will add. Plus a bit of remedial glueing on the ridgeline -- but that
will probably only be a few grams.
A note for those who haven't been following my "traveling light"
posts, I am trying to reduce the weight carried in my Mountainsmith
Daylight lumbar pack, from 4.5kg to 3.5kg (including weight of the
lumbar pack). So the tarp, and planned inner mesh tent, are mostly being
designed for light weight and compactness, rather than for durability.
Tags: light