
TH1P mark-1 simple tarp
I have posted about interesting ideas for a tent, that I named "TreeHugger 1P":
https://bkhome.org/news/202105/th1p-tent-design-using-solvespace.html
However, as I am a neophyte at tent construction, and indeed anything
to do with sewing and fabrics, I decided that baby-steps are in
order...
So have modified the outer skin of the tent to not have the
spreader-pole, and just be a simple tarpaulin. I made the foot-end a bit
higher -- want poles that fold to no more than 25cm long, but can have
two poles at the foot-end, that lock together, achieving about 49cm
length.
This simple tarp can still be tied up as a "tree hugger", and later
could add an inner mesh tent. Just want to create this tarp first, to
learn how to do it.
So, from SolveSpace, figured out the required dimensions of the tarp.
Here they are, and sequence of marking the fabric shown in green:
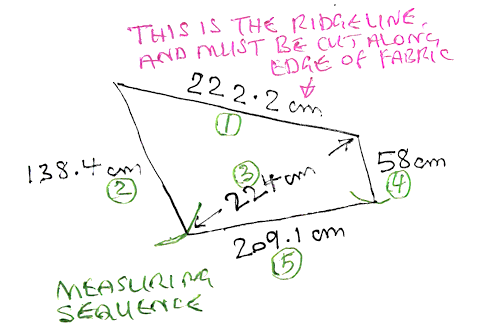
I marked it with a clay fabric pencil, this one, which marks OK on the silicone surface:
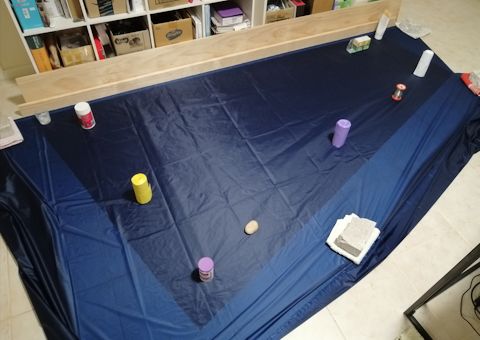
Used normal general-purpose scissors, new and sharp, to cut out. It
isn't easy, this stuff is so slippery, can't cut very straight. It
doesn't have to be a perfect straight line, as all edges will be folded.
I bought new scissors, as they have to be sharp. Scissors get blunted when used to cut paper. These ones:
https://www.bunnings.com.au/trojan-240mm-general-purpose-scissors_p0191105
The fabric is 10D silnylon, silicone-coated on both sides. In fact,
it is impregnated right through with silicone. So it is not only
incredibly thin, but also incredibly slippery. I wasn't able to source
it in Australia, so bought it from these guys (7 metres):
https://www.adventurexpert.com/product/10d-silnylon-fabric/
I then used the first one as a template for the second:
Marked out with fabric pencil and cut the second. Very difficult, as
my lounge room is too small. A large floor area is required, so can walk
all around the sides.
Next step will probably be to sew or glue the side and bottom hems.
After that, join the two pieces together along the ridgeline. Note, the
reason that the ridgeline has to be cut along the side of the fabric, is
that ripstop fabric is more stretchy when pulled diagonally. We want
minimum stretch along the ridgeline.
Tags: light