TH1P tent design using SolveSpace
The first post about the new project, "TreeHugger 1P" tent, was about short carbon-fibre poles:
https://bkhome.org/news/202105/poles-for-treehugger-1p-tent.html
Now, I have used SolveSpace to create 2-dimensional and 3-dimensional
views. I must preface this post by stating that this is very
exploratory, and I do not know if this design will become an actual
physical tent. I know nothing about tent design, and can barely use a
sewing machine, so it will be "venturing into unexplored territory" if I
do actually have a go at sewing it.
Here are the SolveSpace files. This is using SolveSpace version 3.0.
Some OS distributions only package 2.x, and these files cannot be opened
in 2.x. EasyOS 2.7.3 has 3.0. Here they are, gzipped. You will have to
un-gzip them:
Another thing that I want to state up-front: if, in the unlikely
event that someone sees something in this design that they think is
patentable, I claim that every aspect of this design, and features of
this design that I will reveal in later blog posts, is free,
open-source, public-domain, no restrictions whatsoever in copying,
modifying, or using.
I have made this statement because in some countries, the USA in
particular, just about anything can be patented. The original concept of
patents was to protect new inventions, however, that (in my opinion)
got corrupted, and now even just the tiniest twist of an existing
concept, the most trivial idea, can be patented. This is a massive
money-earner for some companies, such as Microsoft. Anyway, onward ho...
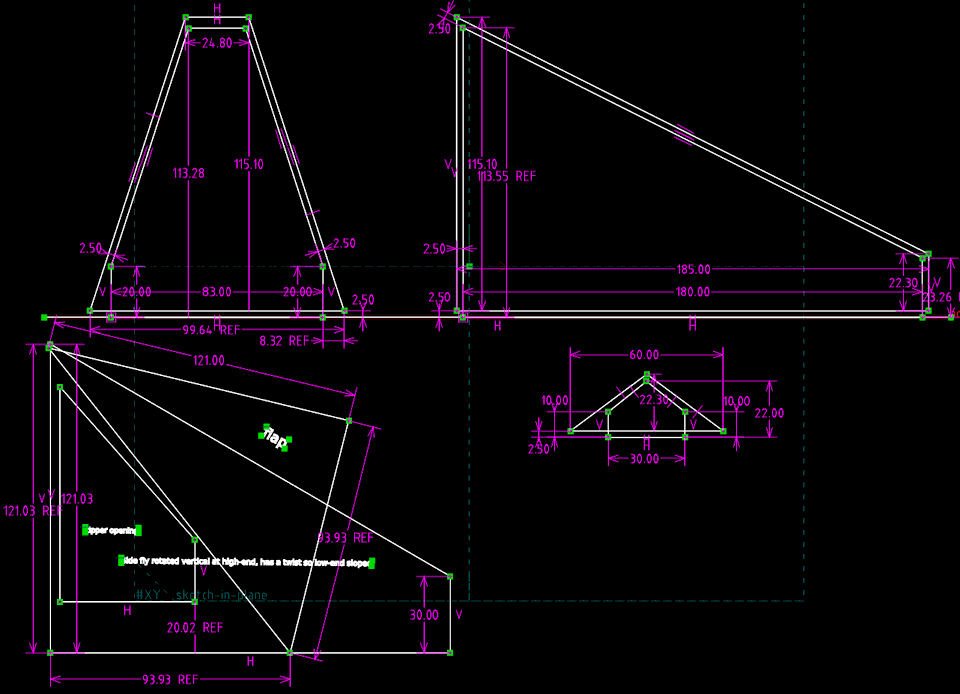
Here is the first SolveSpace file, 2-d views:

And now I can reveal why I have named it "tree hugger". The head-end
can be tied directly against a tree trunk, as the head-end has a
vertical wall.
Yes, it could be away from a tree, with cord to tie the head-end to a
branch, or it could sit on a trekking-pole or any other pole, with cord
to a stake in the ground.
However, I love the idea of being tied right against a tree trunk. I
have previously posted about how to sit comfortably inside a tent, with
various ideas such as sitting cross-legged with bracing to hold the
lumbar-region of the spine erect.
A tree trunk gives you an instant backrest! Inside the tent, lean back
against the tree, maybe with something rolled-up to support the lumbar
region, and hey, comfy!
I have posted previously about the difficulty I have with crawling in
and out of a tent. One issue I have is a degenerated lower-back
vertebrae. The TH1P design has side-entry that has step-in and step-out.
You can see the label "flap", that is the
outer fly. It can unhook from the corner stake and fold back over the
ridge-line, exposing a zippered entry to the inner tent.
The angle of the zippered entry is such that you can just step-in and step-out.
In summary so far, the design has these great features:
- Spreader-bar at the top for head-space.
- Vertical wall at head-end to lean against a tree trunk.
- Fold-back fly and inner mesh zipper opening angled for step-in and step-out.
The other side of the fly can also unhook and fold back, if extra ventilation is required.
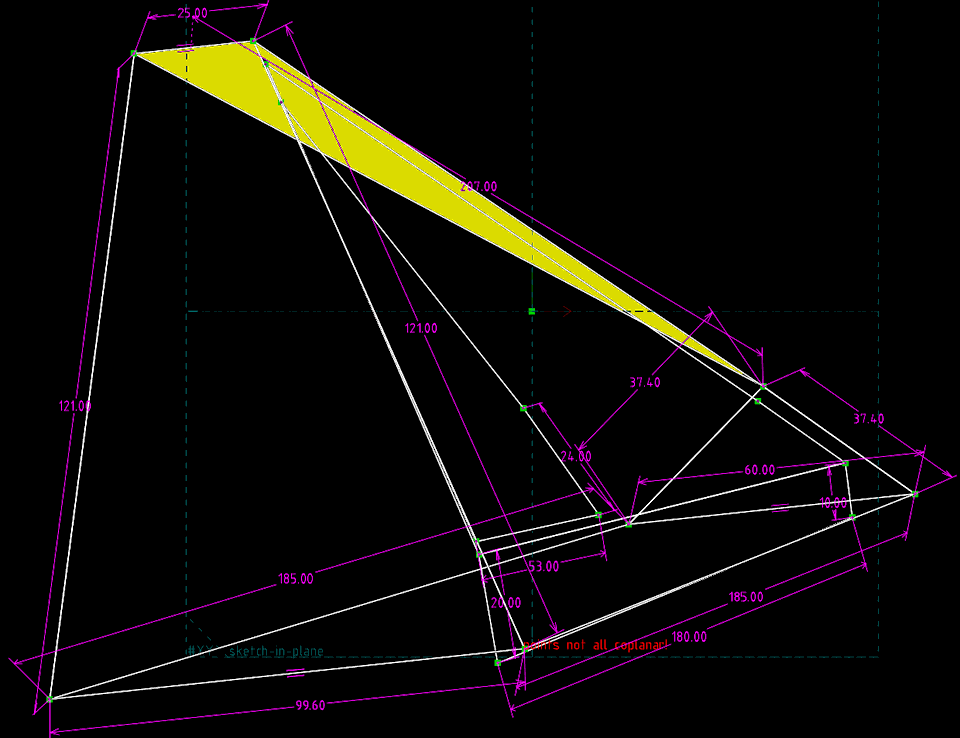
The 3-d view shows that there are two ridge-lines, and I have highlighted the surface formed by these in yellow:

However, to improve water runoff, I plan to join the two ridgelines
into one, about halfway down. This is incredibly complicated to
calculate, how to cut the fabric. This is where the "dressmaker's dummy"
that I constructed should come in handy.
One thing that I am uncertain about is sag. The ridgelines will sag,
no matter how tight the cords at each end are pulled. I don't know
whether to try and compensate for this when cutting the cloth. Once
again, erecting it on the dummy frame should be helpful.
The above 3-d drawing also shows one side of the inner mesh tent.
The length of the inner mesh tent in the above drawings is 180cm,
which I intend to increase a little bit. I am 177cm, about 5 feet 10
inches, but I think a bit more length is needed. The foot-end of the
sleeping bag will extend a bit beyond my body-length. Though, I do
usually sleep on my side, slightly curled. I think will add another 5cm
(2 inches).
There are some more details, that are not apparent from these simple
drawings. These details are in my head, and will be explained later.
Tags: light
