
Insulation under floor of water distiller
The saga continues. Here is the previous post in the gradual
accumulation of what is intended to be DIY plans for a solar water
distiller:
https://bkhome.org/news/202001/construction-of-distilled-water-runoff.html
Now for the insulation under the floor of the basin. I was going to
use fibreglass batts, after misadventure with using expanding foam with
the previous prototype:
https://bkhome.org/news/201911/first-go-at-using-expanding-foam.html
...in that case, I had spread baking paper, which turned out to be a
very bad idea. If I spray the foam directly onto the (slightly damp)
plywood, it will stick and (hopefully) not lift off. So, decided to give
expanding foam another go...
Before we get to putting in the insulation, there is the matter the
inlet and drainage plumbing. Contrary to what you might expect, I put
the inlet as a hole in the floor of the basin, not on the side wall. I
also cut a hole for drainage. These two holes are at opposite sides of
the basin, with the intention that water can be poured into the inlet
and flow out the drainage hole, for periodic flushing of the basin.
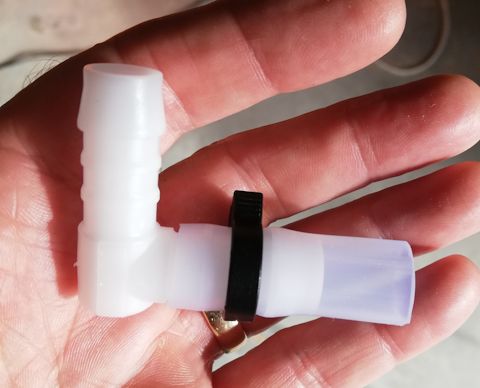
Both holes were cut with a 16mm spade drill bit. Silicone tube is
then inserted into the hole and sealed with black silicone sealant. I
want the tube to bend 90 degrees, so I bought two Norma brand 13mm
elbows:
...these are for automotive use, and the plastic will work up to 120
degC. Cost a bit more than trickle irrigation elbows from Bunnings
though, AU$4.97 each.
These are attached to a short length of silicone tube, and I did use a cheap Bunnings trickle-irrigation plastic pipe clamp:
...the silicone tube could probably have been bent 90 degrees without
needing an elbow, without kinking, and maybe with some channel to
prevent it from flattening. Anyway, I went for the Norma elbow.
Next, it was glued into the basin floor, here is the underneath view:

...there are some pieces of wood placed to hold it in place while the sealant sets.
Here is the underneath view when both inlet and drainage pipes are fitted:
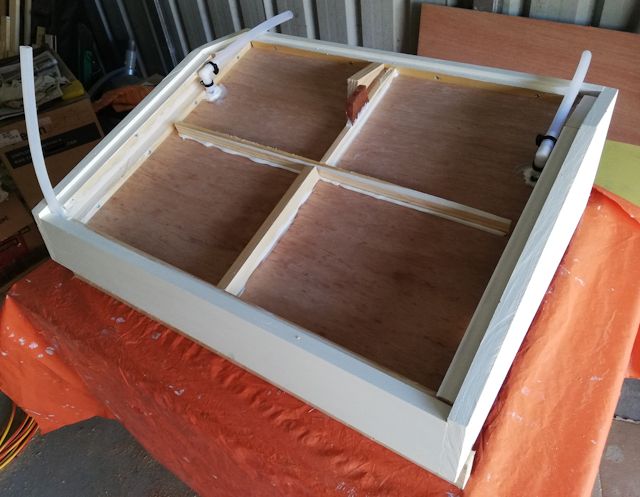
...notice the two blocks of wood in the top-middle. They are just
some scrap pieces, placed there to give the bottom plywood something to
screw onto.
The bottom plywood is two pieces. I won't give measurements, as it is
easy enough if you build this, to measure and cut the plywood. It is
the same 6mm marine ply that I used for the floor of the basin, cut from
the same original 810x1220mm sheet purchased at Bunnings. Here is what
the two sheets look like when fitted:
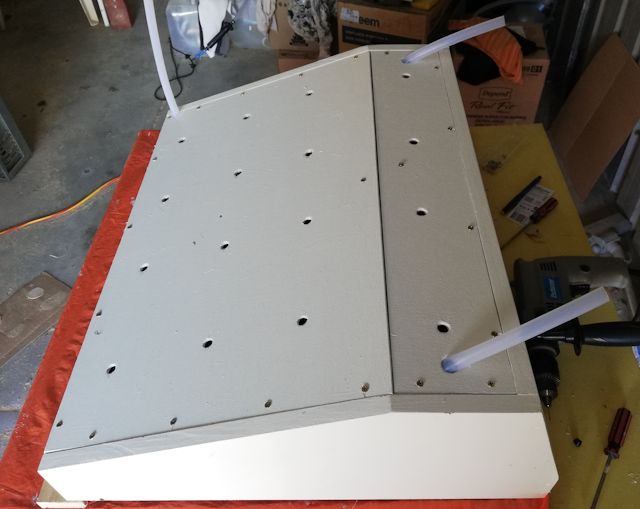
...16mm holes were cut for the tubes to stick through, and filed to allow the tubes to come through at an angle.
About those little holes in the above photo. 12mm holes. I had the
idea of screwing on the bottom plywood sheets, then use those holes to
inject the expanding foam.
Ha ha, that stuff has a mind of its own! Yes, I did try that idea,
injected the foam, but it built up enormous pressure, and the plywood
bowed out. I needed to have screwed it down more firmly in the middle. I
had reasoned that the excess would come out of those holes, but that
didn't happen ...perhaps the holes should have been bigger.
Aborted that. Took the plywood sheets off, bought another can of
expanding foam and, the next day, after a spray of water, spread the
foam all over the surface, as best I could anyway. This snapshot is just
after spraying, it did expand some more afterward:
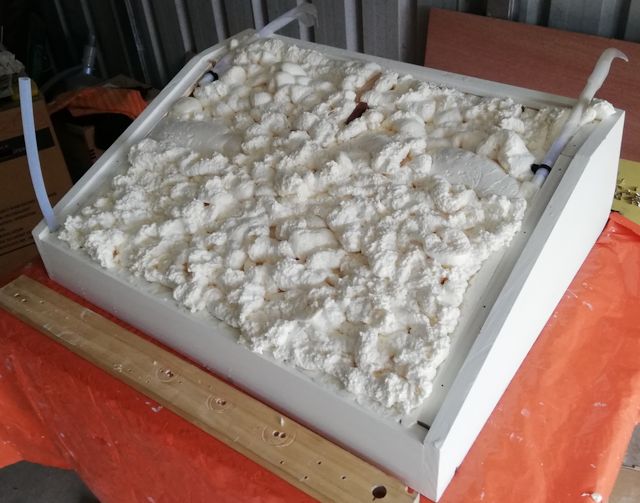
...baking paper was wrapped around the silicone tubes, with sticky
tape, not that I really expected the foam to stick to the silicone tube,
just being paranoid.
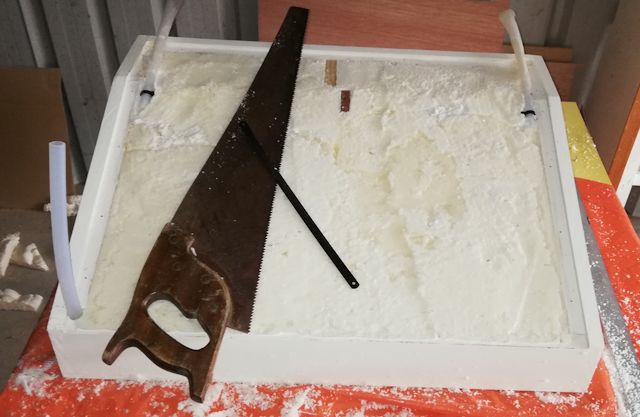
Waited another day, then used a large wood saw for most of the
cutting, then a hacksaw blade to finish off, got it reasonably flat:
So, what's next? Obviously, any water placed into the basin is just
going to run straight out of the pipes in the floor. However, the
drainage pipe will have a tap attached and the inlet pipe will bend up
and be attached to a funnel.
This means that there will be water in those pipes, and you might
think that will mean heat loss. However, water is quite a good
insulator, and mostly any heat loss would be due to convection, hot
water rising and thus the water circulating -- which won't happen in
this case, as the hot water is at the top.
Actually, this is an experiment. I will measure the water temperature
where the pipe comes out the bottom of the distiller, very interested
to find out just how much it will heat up.
Shopping list (prices in AU Dollars):
| Norma elbow 13mm x2 |
2x $4.97 |
| 6G 16mm wood screws, 40pk |
$3.98 |
| Expanding foam, 750ml (Bostik) |
$14.85* |
* I used two 500ml cans, however, that was due to a misadventure. A
single can should be OK, and probably it will have to be more than
500ml.
Tags: nomad