Wiring of powerbox underway
I have started the internal wiring of the lithium powerbox, and
this post is a progress report. Here is the previous post for this
project:
https://bkhome.org/news/202004/powerbox-external-assembled.html
It is progressing slowly, but surely. I had to pause for awhile to
think about some construction details. Anyway, here is a photo showing
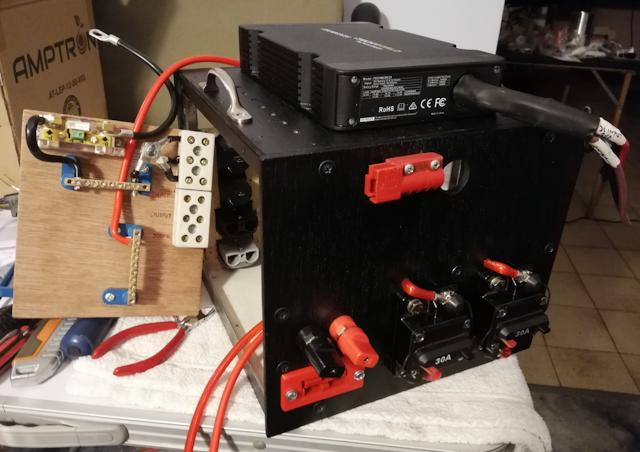
the wiring so far:

...notice that the box is now painted black! I used a cheap "flat black" enamel paint spray can.
A change from the previous photo (see above link) is that I removed
the Anderson plugs from the DC-DC charger and cut a round hole for the
cables to go into the box. Next to the round hole is "half" of an
Anderson plug -- this is for the wiring to the vehicle ignition key.
The wiring-board is propped alongside the box, for the photo.
Top-left of the wiring-board is the shunt for the coulometer, the two
black and red cables sticking out the top will go to the battery.
The "+bus" and "-bus" busbars were purchased from Jaycar:
https://www.jaycar.com.au/machined-brass-busbar-8-way/p/SZ2003
The terminal blocks at top-right are for wiring to the DC-DC charger. I purchased porcelain blocks:
https://www.jaycar.com.au/3-wire-porcelain-terminal-block-30-amp/p/HM3185
...however, afterward I noticed these, which would probably do the job:
https://www.jaycar.com.au/60-amp-12-way-screw-terminal-strip/p/HM3204
The blank space on the wiring-board is where the fuse holders will
mount. This is where I had some problems, as the blade fuse holders in
local shops, of the surface-mount terminal-block type, seemed too
"light" to handle 20-30 amperes. The engine-bay is a more extreme
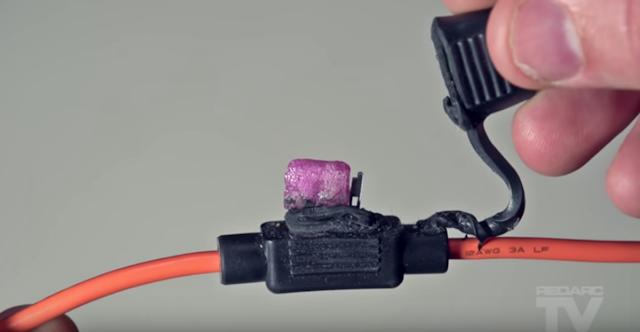
environment, but this Redarc video does show the potential for
catastrophic failure when using blade fuses:
https://www.youtube.com/watch?v=kZ76NsvvBE0
Snapshot from the video, of a melted inline blade fuse holder and fuse:

I intend to post soon about what fuse holders I chose, and what got rejected.
Tags: nomad
