
Meanderer trike front suspension plates
Previous blog post in Meanderer trike project:
- Front wheel hubs for tadpole trike — March 12, 2025
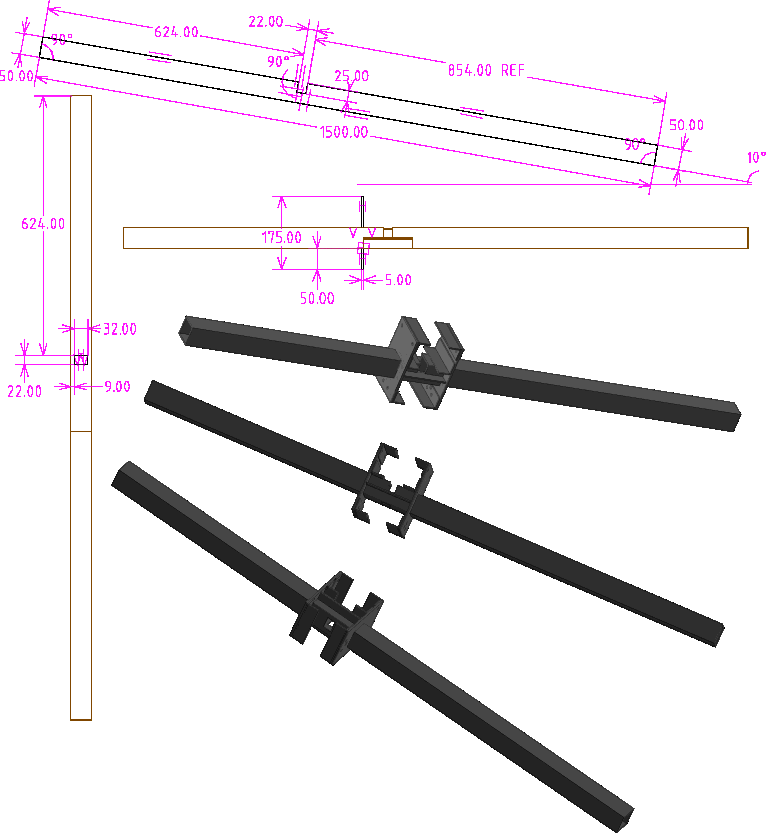
The front of the trike will have suspension, with swing-arms (also known as A-frame or wishbone arms) and shock-absorbers. The swing-arms will hinge on two plates attached to the frame of the trike. The frame is a 25x25mm square tube, 3mm wall thickness. The plates are 110x175mm sheet, 5mm thickness. There will be extra bracing with angle, as illustrated:
More construction details will be revealed, but for now, contructing just the two plates. They have holes and 50x50mm cutout:
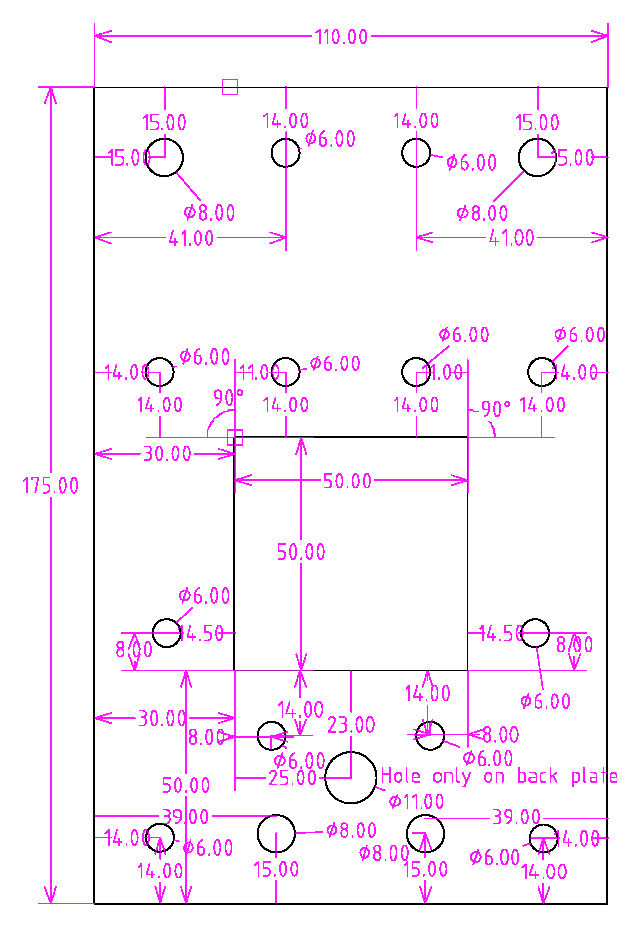
...regarding those 6mm holes; in fact, I used a 4mm drill bit, the intention being to later tap a thread for m6 bolts.
In an earlier blog post, there is a link to where I purchased the
5mm thick sheet. However, in retrospect I would have bought 6mm
sheet, as that is more common and discovered available locally at
a reasonable price.
I marked out the holes and cutout, then cut the plates on a metal bandsaw:
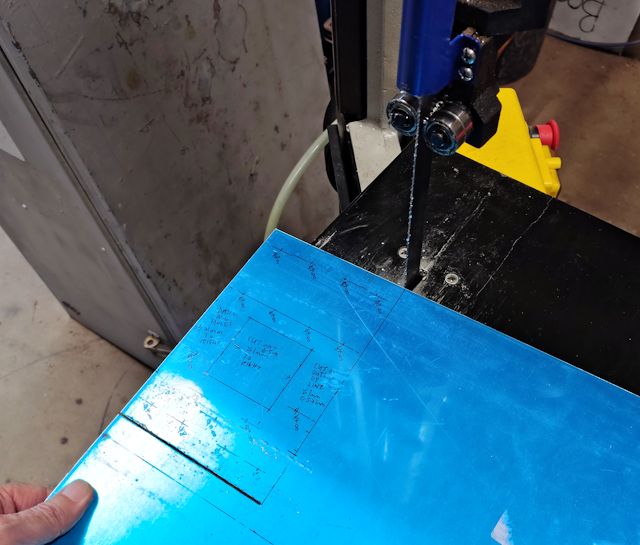
...yes, I know this project is intended to be do-able by anyone in their home workshop; a handheld jigsaw does the job OK also. In fact, I found that a jigsaw was the best choice for the 50x50 cutout.
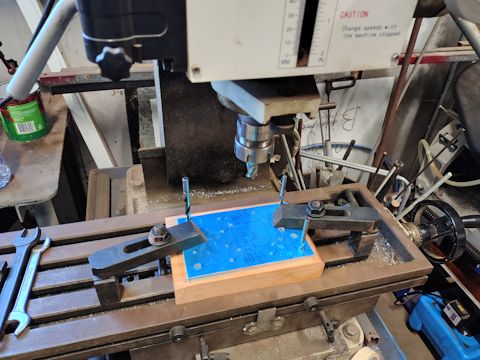
Then put the two plates together, firmly clamped on a block of wood, and drilled the holes with a hand drill (after centre-punching):
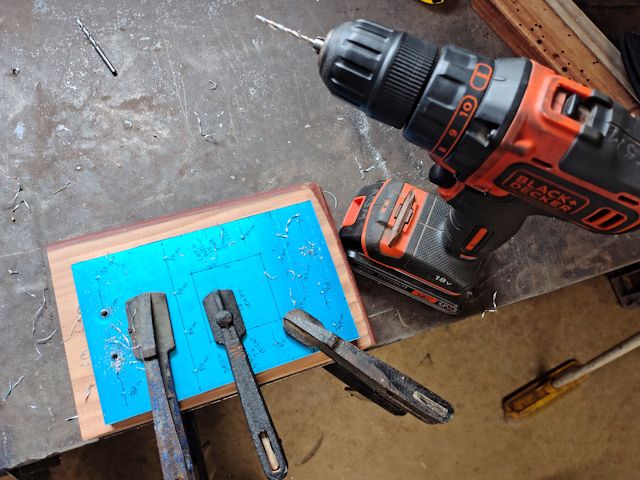
...took the precaution of driiling 2.5mm pilot holes first, for
greater accuracy. For the 8mm holes, it would also be good
practice to drill another intermediate hole, say 5.5mm. The reason
is, large drill bits tend to wander off-centre, and a pilot hole
keeps them centred.
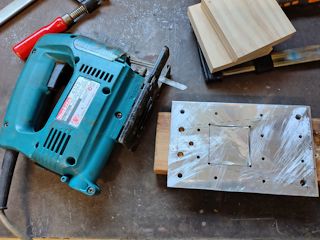
The 50x50 cutout... expected that to be tricky. We started to do it on a large metal router at the Men's Shed:
...no, not appropriate for a DIY guy in the home workshop! Besides, we decided that it is a clumsy way to do it. Instead, used a hand jigsaw. Firstly, took off the protective plastic, then re-marked the 50x50 cutout:
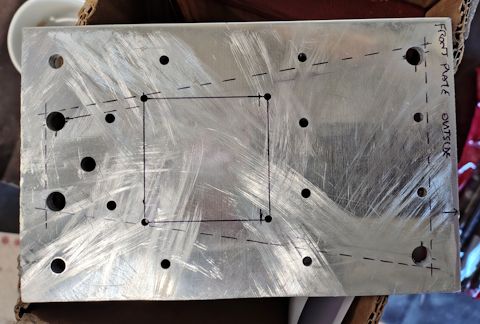
...the four 8mm holes are the suspension hinges for the
swing-arms, and the 50x50 cutout has to be symmetrical. I drew
lines on the outside of the 8mm holes, to help with measuring
symmetry.
I had previously drilled 3mm holes in the corners of the cutout, which we thought might be useful. But in retrospect, probably not. Or maybe just smaller, like 2mm.
Anyway, got the cutout re-marked, then drilled 10mm holes in opposite corners, as close to the marked lines as possible. Then used a square file to make the corners square, for insertion of the jigsaw blade. I used one of the jigsaws in the Men's Shed; it already had a blade in it, didn't know if for wood or metal, but it did have fine teeth, which I wanted:
 |
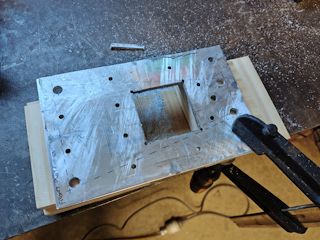 |
...yes, nice cutout. Just cut one plate, then used that to re-mark the second.
A bit of fine-tune filing was required, then it was able to slide snuggly onto the 50x50 tube:
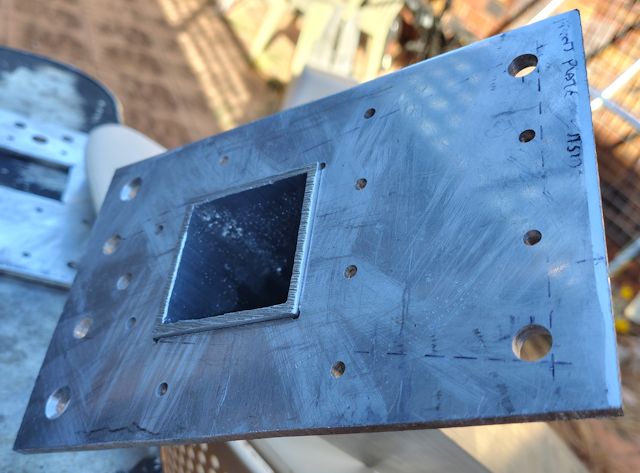
...notice those two holes in the bottom corners; countersunk. The
two closer-in are the 8mm holes for the swing-arms, the two outer
holes were supposed to be drilled with a 4mm drill bit, for later
tapping for m6 bolts. However, a lapse in concentration and I
drilled 6mm holes. So decided instead they will be countersunk
bolts.
So, what's next...
Tags: light