
Meanderer trike tilt-arm install
This is a continuation of construction of the trike tilt-arm; see previous blog post:
- Meanderer trike tilt arm — May 05, 2025
I posted about the requirement for another bolt to firmly lock the 10mm rod to the bottom of the tilt-arm, see photo:

As there is a pre-existing 8mm hole, I used a m9 bolt with 1.0 pitch. Bought the bolt and thread-tap off Aliexpress (bolt is m9x1x16mm, tap is M9x1):
https://www.aliexpress.com/item/1005008662208474.html
https://www.aliexpress.com/item/1005007467118243.html
The rod is 304 stainless steel, and I filed a flat spot on it so that the larger bolt can firmly hold the rod, prevent it from rotating. However, I'm thinking of using an aluminium rod instead, as the bolts will more easily bite into it.
Here is the rod put in place temporarily, so as to align the bearings:
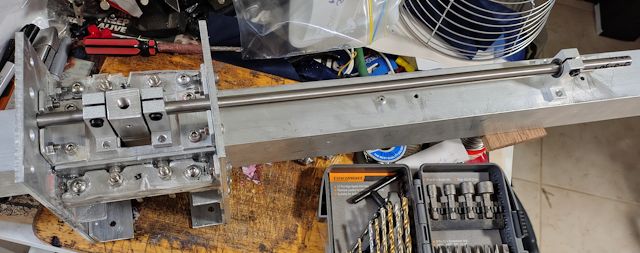
Perhaps I have repurposed those bearings, not using them as they are intended, but they do the job. What I have done is use those bearings with 12mm ID, and brass bushes inserted. Got them from Aliexpress; the bearings are SK12 and the bushes are 18-12x10x15:
https://www.aliexpress.com/item/1005006980484148.html
https://www.aliexpress.com/item/1005005073792086.html
As noted above, the rod is stainless steel, and the brass bushes will wear and can be replaced. However, if I change the rod to aluminium, it will wear more than the bushes, which would be OK, as the rod can easily be replaced.
With those two bearings in place either side of the tilt-arm, I marked the holes, then carefully drilled and tapped for m6 bolts. As I am now going all-out using epoxy resin, these bearing are now very firmly locked in place, with epoxy sandwiched between the surfaces and in the threads:
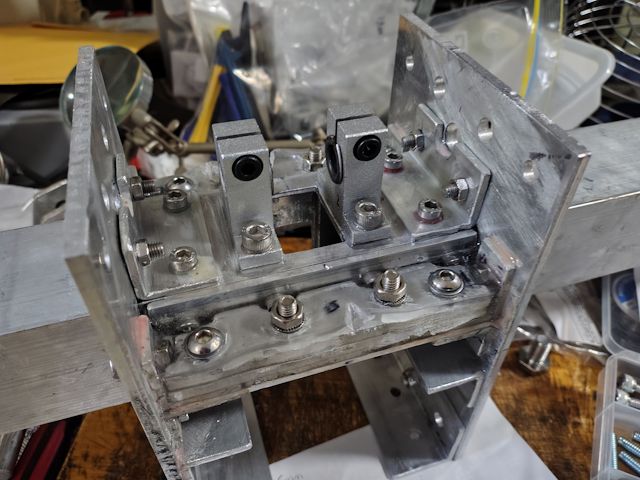
I have learnt something about epoxy resin; it expands when setting. More precisely, it expands right at the end of the setting process. I'm using "casting epoxy", that takes a long time to set, 2 or 3 days, but when set is very hard. This stuff, from eBay:
https://www.ebay.com.au/itm/356610425094
I have made a mistake; poured a pool of resin, as you can see in the above photo. A close-up:
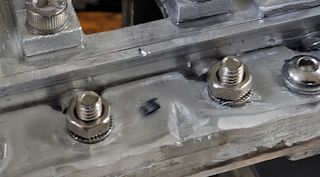
...the intention was to fill all the crevises, but I also poured a bit more and had a 3-4 mm layer on top. After a few days, it lifted up off the aluminium, due to expansion. In the above photo, I have cut a notch. It is alright, just doesn't look good.
The expansion is good when the resin is sandwhiched between aluminium and in bolt threads; really tightens everything up. But, as I now know, not so good if just sitting as a layer on top. Lesson learned.
There is a major challenge ahead, that I have been puzzling over.
The photo showing the long rod; it won't be that long. It will
just come out a short distance, to a "shock absorber coupling".
This coupling is to absorb sudden shocks from the tilt-arm, when a
front wheel hits a bump. It's the achilles-heel of the tilting
mechanism, well one of them anyway. I think, have figured out how
to do it; that will be a post coming soon.
Tags: light