
Distiller prototype 3 morphs into 4
I posted about the first test of water distiller prototype #3 here:
https://bkhome.org/news/201910/first-test-of-water-distiller-prototype-3.html
Then about modification of the inlet to have two silicone tubes:
https://bkhome.org/news/201910/brackets-to-hold-inlet-tubes.html
However, wanted to make more changes, so decided to re-cut the wood
frame. Bought another 64x19mm 3m length of dressed pine from Bunnings,
and went through the exercise pretty much as before, except for a few
changes.
Casey, from Glass Perth, wanted to give me 3mm glass, as he had
previously supplied 4mm glass. He didn't want to accept any payment,
however, I insisted that he take AU$30. There had been a
misunderstanding originally, and I was supplied 4mm glass for prototypes
1-3.
The inside pane will still be 4mm, however, Casey has supplied two
3mm sheets for the front and back. This will make the distiller lighter,
though I don't know how it will affect efficiency of water production.
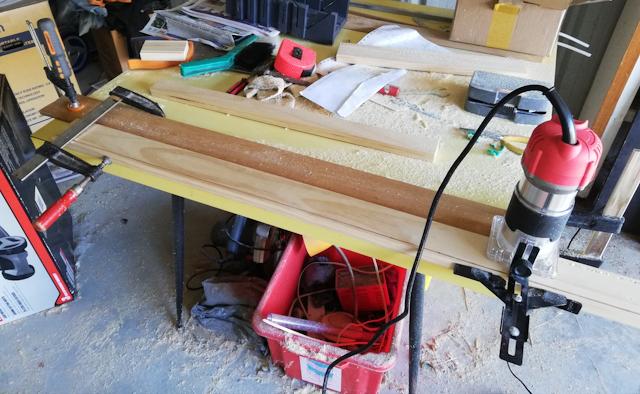
Thinner glass means that the grooves in the wood frame need to be
thinner, and the original 1/8 inch (3.2mm) router bit that I had
purchased from Bunnings now suffices for top and bottom glass panes.
Here is the setup cutting the grooves:
The distiller outer dimensions are 700mm high by 600mm wide.
Previously, I had cut the two side pieces 700mm long, and the top and
bottom pieces 572mm (600 - 19 - 19). This time, the top and bottom
pieces are the full width 600mm and the side pieces 672mm (700 - 19 -
19).
As stated in an earlier post, the air circulates, rising at the
front, then falling down the back. I wanted the gap at the top, for the
air to flow between top of middle-piece of glass and wood frame, to be
slightly larger, so cut a 3mm deep slot in the top piece of the frame:
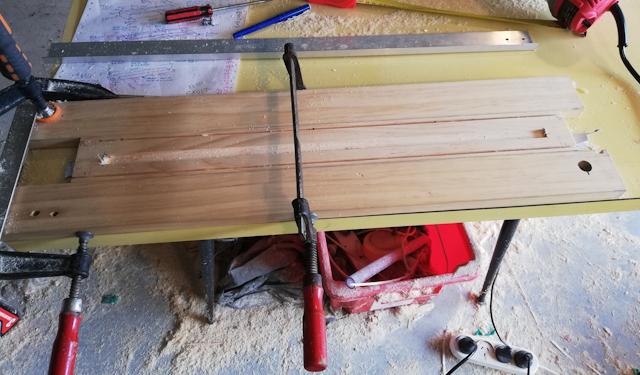
...the two side pieces in that photo are from prototype #2, being
used here as convenient holders for the top-piece. Later on, chamfered
the edges of the slot with coarse sandpaper for good air flow.
I also wanted to cutout the bottom piece for water runoff. Distilled
water will be coming down both top and bottom glass panes. Here is how I
cut it out:
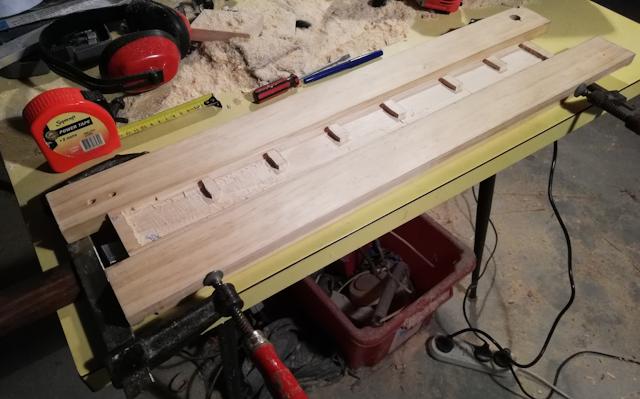
...notice the little bits left raised -- they are to support the top pane of glass.
The above photo shows one side raised. This is for the final stage of
cutting, where I want a slight slope for water runoff, so that it flows
toward the exit tube. Here is a close-up of the exit-end, showing also
the 7mm hole drilled for the distilled water exit tube:
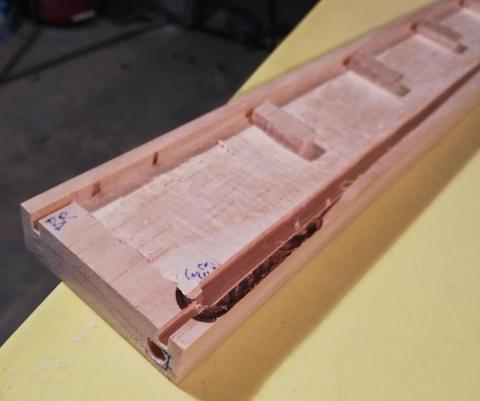
...you can see how the water will run down from the top glass pane,
and off the bottom pane, into the sloping channel and hence to the
outlet hole.
Notice also, the top and bottom 3mm grooves go right to the ends of
the wood. This is because I cut those grooves before cutting the pine
into separate top, bottom and side pieces. For the top and bottom
pieces, I would have been better to have cut the grooves to only 13mm
from the ends of the wood, to maximize strength.
Anyway, I ended up putting epoxy into those little 13mm lengths of groove, to stop water running out of them and for strength.
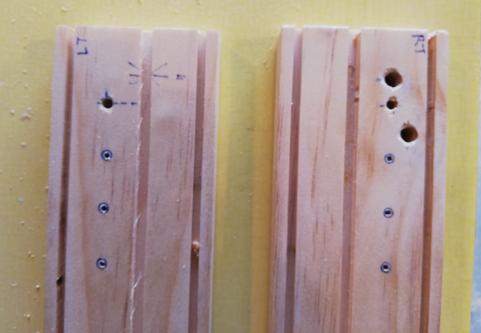
The two side pieces have grooves and holes as before, except for placement of the water inlet tubes:
...and as already mentioned, the top and bottom glass panes are 3mm
(1/8 inch router bit) and the inner is 4mm (4mm router bit -- actually, I
used the 1/8 inch at first, then widened with the 4mm bit).
Oh, another change, I extended the slot for the middle glass pane,
right to the end of the wood, so that it can be slid out if required.
I am now building the fold-out legs, and will post about them soon.
Tags: nomad