
Distiller prototype 4 assembly
I posted yesterday, construction notes for solar water distiller prototype #4:
https://bkhome.org/news/201911/distiller-prototype-3-morphs-into-4.html
Today I assembled it, which required construction of items to hold
everything together. Well, this part was constructed yesterday, the
bracing bars:
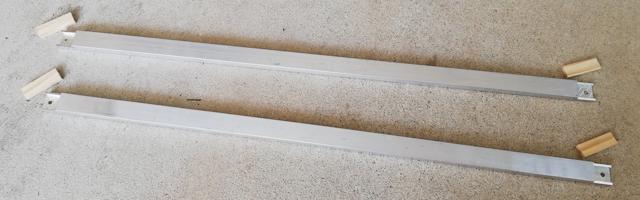
...these bars attach underneath the distiller, and serve two
purposes: they hold the wood frame sides together, and they are mounting
points for the leg hinges.
The bars are aluminium rectangular extrusion 20x10mm and wall
thickness 2mm. I bought two 1m lengths from Bunnings, at AU$6.20 each:
https://www.bunnings.com.au/metal-mate-20-x-10-x-2mm-x-1m-aluminium-rectangular-tube_p1130559
I could have just screwed them as-is (cut to 600mm) underneath the
wood frame, however decided to cut indents. This only reduces the width
of the solar panel by 3-4mm, but went for it anyway. The above photo
shows the ends cut-out and holes drilled. The pieces of wood were
epoxied in to give a flush surface.
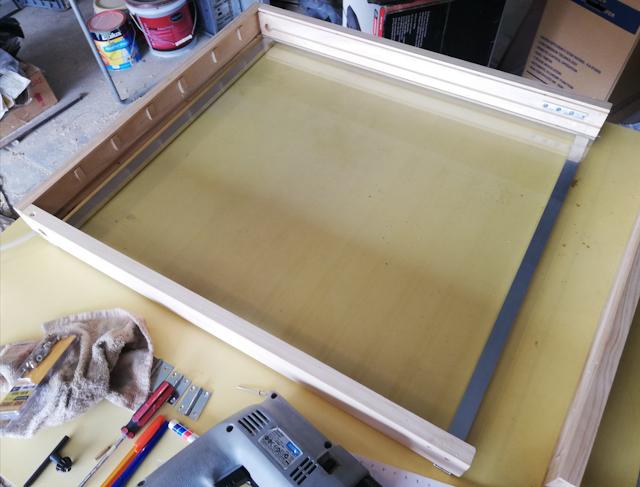
Today I started to assemble the distiller. This photo shows the
bracing bars screwed underneath, to the side wood frame pieces, the
bottom piece of the wood frame screwed onto the side pieces, and the
bottom glass pane has been slid in:
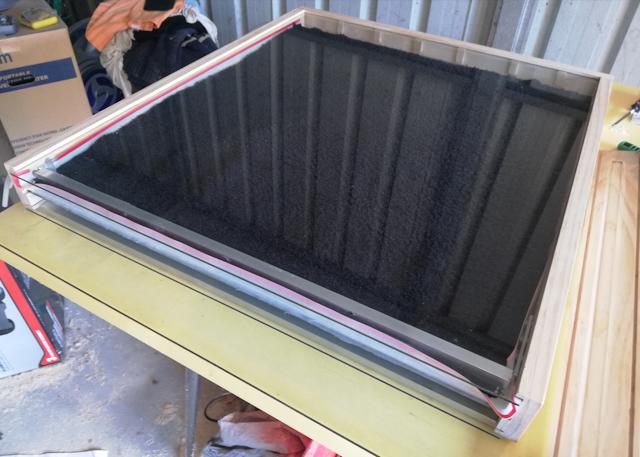
Next, the middle glass pane was slid in, the cloth laid on it, and
the inlet pipe assembly inserted. Then the top glass pane was slid in:
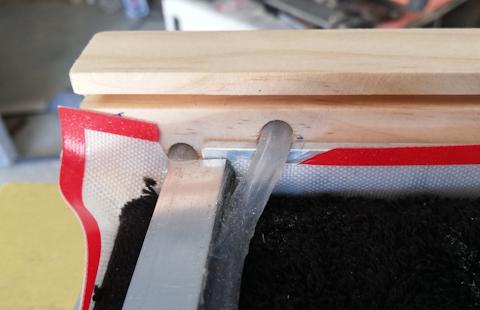
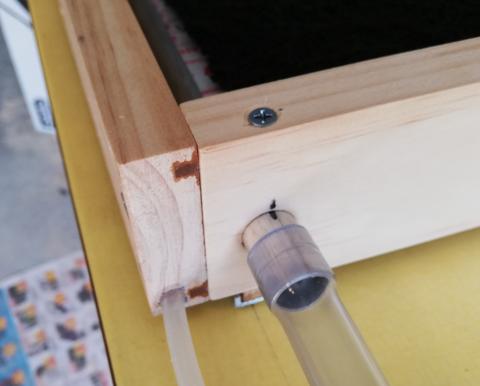
The inlet assembly is two silicone tubes, 6mm OD. Each end of the
assembly has a brass rod sticking out, that is latched in place -- see
earlier posts. Here is a picture showing the inlet-end:
Almost finished! The top piece of the wood frame has to be pushed on,
and this must have quick-release latches, so that it can be taken off.
Removal of the top piece will allow the inside to dry out, which is
vital if the distiller is to be taken out of service for long periods.
Removal will also allow the glass panes to slide out so as to access all
parts of the interior.
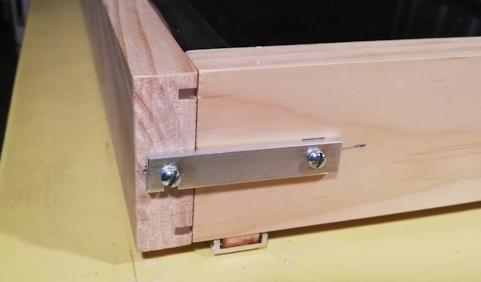
The quick-release latches for the top wood frame are made from 12x3mm
aluminium bar, attached with screws. The bar and screws were in the
garage, so didn't have to buy anything. Photo of one of the latches:
Another detail of the construction: the following photo shows the two
outlet pipes, waste water and distilled water. The waste water comes
out of the 16mm OD aluminium pipe, and notice the screw on top:
...that screw is 6g 30mm countersunk-head wood screw, with a 2mm hole
drilled through the wood and the pipe. The screw is just long enough to
reach the pipe and lock it in place, to prevent it from turning.
The final step of assembly will be the legs. I have some 6mm marine
plywood that I want to use, rather than making yet another purchase at
Bunnings. This will probably happen tomorrow afternoon, as a family
engagement in the morning.
Tags: nomad