
Installation of the coulometer LCD display
The previous post in the powerbox project:
https://bkhome.org/news/202004/wiring-board-installed-in-powerbox.html
The finishing touch is to install and calibrate the Amptron
coulometer. As already discussed, the shunt is already mounted on the
wiring-board. This is what I have:
https://www.amptron.com.au/100a-coulometer---battery-monitor-with-shunt.html
If you search on eBay and elsewhere, for "battery coulometer", you
will find this available from many vendors, and there are also setup
videos on YouTube.
Installing the coulometer
There is a shielded cable to connect the shunt to the LCD display,
and this is a problem, as it is very long. This is for the situation
where you want the display somewhere else, maybe on the dashboard of the
vehicle, or whatever.
I want to cut it right down, as the LCD display is close to the
shunt. So, I cut the plugs off each end, and joined the cable. I am
familiar with delicate electrical work, as I was an electronic engineer
in my working days. I have a small soldering iron and fine solder for
the purpose. The wires inside this cable are so tiny, this photo blows
it up, but in actuality they are so tiny. The photo shows after I have
stripped each wire and twisted them together:
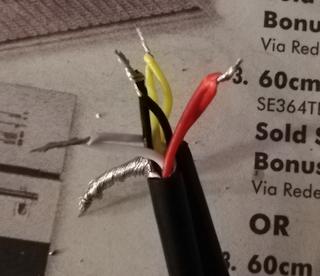
...I then very carefully soldered each join, then put heatshrink
tubing over each join, then bound it all together with electrical tape.
I know that such delicate work will be a challenge for many -- well,
you could just go and buy a ready-made powerbox! But it is not
insurmountable. The wires are so tiny, I stripped them with my
thumbnail, pressing onto the table -- my cable stripper does not handle
such tiny wire.
Calibrating the coulometer
I watched one of the YouTube videos on how to calibrate the
coulometer, but it is misleading. They set "full" and "empty"
corresponding to certain battery voltages, but this could be very
inaccurate.
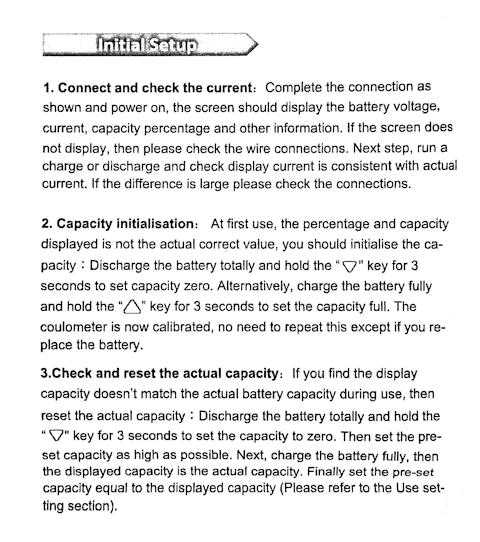
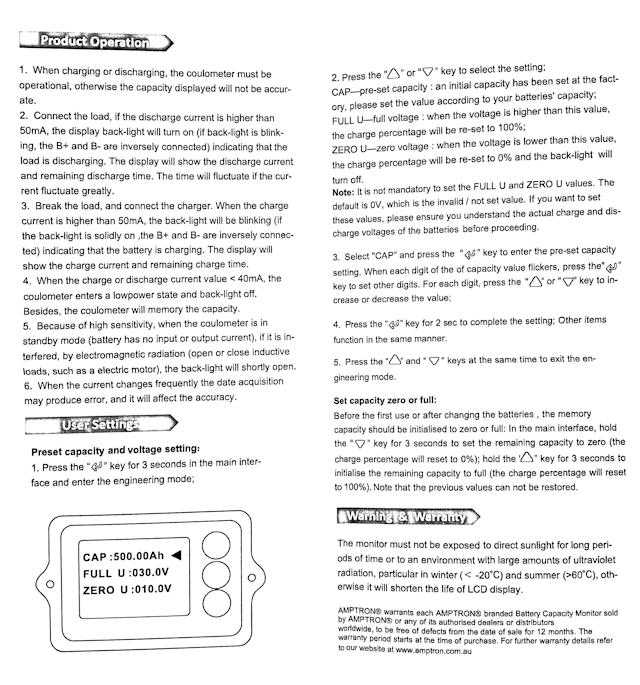
Here are the instructions:
What I did was first charge the battery to 100%, using the Amptron mains-input lithium 15A battery charger:
https://www.amptron.com.au/15a-12v-lithium-lifepo4-battery-charger.html
...this has eyelet lugs, that I replaced with a black Anderson plug
-- very convenient, just plug it into the powerbox, and it will charge
until 100%.
Following the above instructions, I then pressed the "up" key for three seconds to set the display at 100%.
Following the "User Settings", I then chose battery capacity as 50AH
-- note, the buttons have to be very firmly pressed, and getting out of
"engineering mode" proved to be difficult.
That's it, I did not set "FULL" and "ZERO" voltages, as that is not a reliable indicator of 100% and 0%.
Using the coulometer
I plugged my Powertech 150W inverter (purchased many years ago from
Jaycar, and used on many camping trips) into a cigarette lighter socket,
and plugged in a desktop lamp:
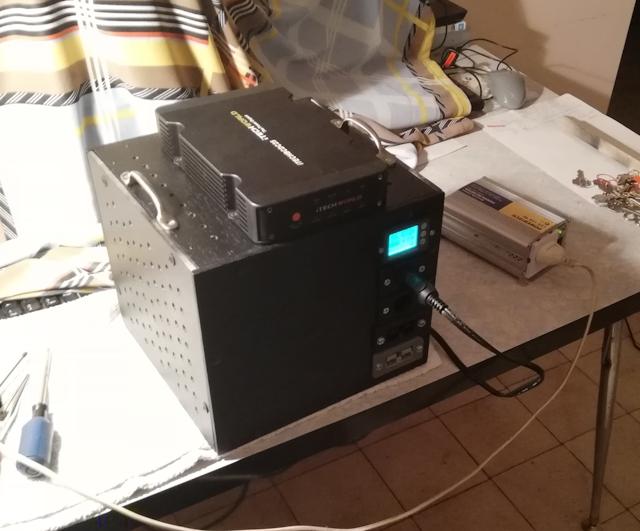
Fantastic, working! Here is the LCD display:
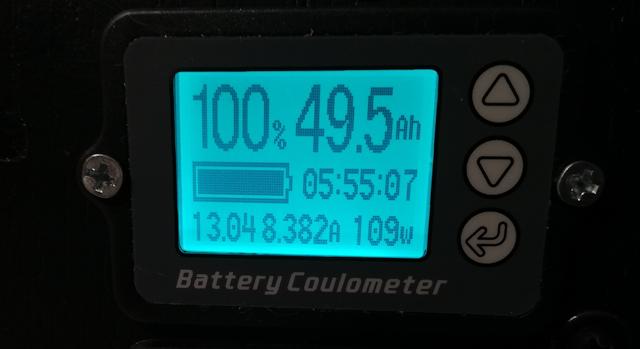
Very nice! That snapshot is after running the lamp for a short time, the capacity has dropped a bit below 50AH.
EDIT 2020-05-04:
After further reflection, I decided it is a good idea to minimize "error
creep" of the State-Of-Charge, by setting a lowest voltage for 0%. See
this later post:
https://bkhome.org/news/202005/coulometer-error-creep.html
Tags: nomad