Powerbox side panels and battery clamp
Here is the previous post in the new lithium powerbox project:
https://bkhome.org/news/202004/top-plate-of-lithium-powerbox.html
Today I cut out the side panels, and implemented a solution for holding the battery down.
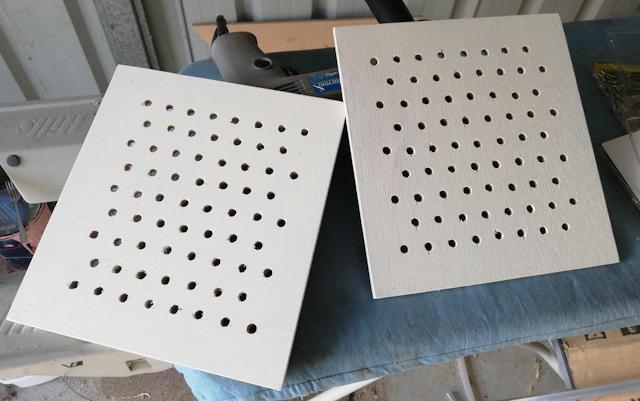
Firstly, the side panels. These are 228 horizontal by 212 vertical,
6mm thick plywood. These will screw onto the sides, and be removable --
the left is where the battery will slide in, and the right is to access
the electrical wiring.
Pretty simple, cut them out using a tenon saw, drilled holes in an offset-pattern, and a coat of acrylic paint:

Out of curiosity, I contacted a local business that specializes in
custom perforated aluminium. Their quote for the same thing in
aluminium, 1.5mm thick, 40%-open pattern, was AU$80 + GST. That would
mostly be labour cost of course.
The battery needs to be held in place, both horizontal movement and
jumping vertically. I will put some angle to make sure it doesn't creep
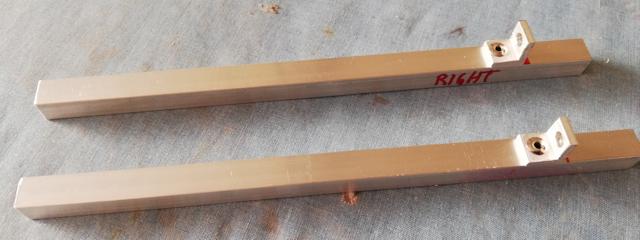
horizontally. To stop jumping, I created two vertical posts:

...two pieces of 10x10x1.5mm aluminium channel, with 12x12x3mm angle
riveted to them. I used stainless steel rivets, for the extra strength,
which I think will be OK -- but if someone is following these plans, you
might consider using 12x20x3mm angle, with two rivets.
Um, Bunnings only have 12x12 and 20x20 in the 3mm thick angle. Here is the 12x12x3mm:
https://www.bunnings.com.au/metal-mate-12-x-12-x-3mm-1m-aluminium-equal-angle_p1067857
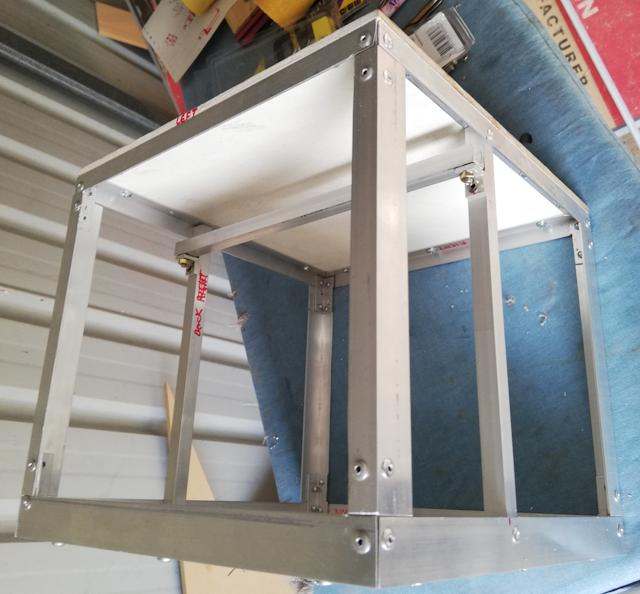
After riveting it into the box:

...10x10x1.5mm channel is used as the cross-piece. The clamping bolts
are M4 10mm hex-head, which is a very convenient size, as the hex-head
fits snuggly into the channel.
I have 10mm length, however might pop down to Bunnings and buy 16mm
length, so as to be able to use two nuts (to lock them in place):
Or:
The cross-piece is shown in the photo for illustration, but it would
only be inserted after the battery is placed inside the box.
So, what is next? Front and back panels I think.
Tags: nomad
