
Glueing hems for TreeHugger Mark-3 tent
Continuing the Mark-3 tent construction. It started with a design in SolveSpace, reported here:
https://bkhome.org/news/202107/more-tweaks-for-treehugger-mark-3-tent.html
I am using 10D "burnt-orange" silnylon ripstop fabric. Yesterday conducted tests on the "peel strength" with silicone adhesive:
https://bkhome.org/news/202108/testing-peel-strength-of-10d-orange-silnylon.html
I have cut out the two pieces, and together they weigh 182g, so it is
going to be very interesting to find out how much weight the glueing
will add to that.
In yesterday's blog post, I tested both neutral-cure and acetic-cure
silicone sealant, and today started to use the Selleys 401 Engineering
Grade silicone. Did two hems, then realised a couple of disadvantages of
the acetic-cure...
For the neutral-cure, I am using the Monarch compact applicator gun, this one:
https://www.bunnings.com.au/monarch-mini-compact-caulking-gun_p1662108
Monarch do not make an acetic-cure silicone, so I had to use the
full-size applicator gun. This has a disadvantage, apart from being a
bigger and heavier thing to wield, when the fingers are taken off the
trigger, silicone still oozes out of the nozzle. Even after pressing the
relief-trigger, it still oozes out.
However, the design of the Monarch compact applicator is such that
when the fingers are taken off the lever, the flow stops immediately.
This precise control makes application so much easier. And, it is
smaller and lighter.
The second disadvantage is that acetic-cure silicone skins quickly.
This is not just an issue with applying, but I found it also gunked-up
my spreader tool. I have this special spreader tool, introduced here:
https://bkhome.org/news/202106/refinements-to-glueing-tarp.html
When glueing the hems, I run the applicator gun along for about 30 -
40cm, then use the spreader tool, then fold over the hem. I am concerned
about the rapid skinning of the surface. It seemed OK, but might be an
issue if I tried a longer run and/or was very slow to fold over the hem.
I did two hems, then decided to go back to neutral-cure and the
Monarch applicator gun. I did comment yesterday that perhaps the peel
strength of the acetic-cure join might be a "tad" stronger, however,
that really might have been my imagination -- they are both strong.
Regarding glueing of the hems, here is a photo showing the hem on the tail-end flap, ready to be glued:
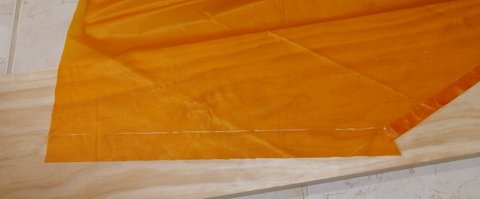
Each piece of fabric has a flap at the tail-end of the tent, that
will be joined together, to enclose the tail-end. The hems are 1.5cm, so
there is a chalk line marked 3cm from the edge. I run the silicone
along, following the chalk line, then fold over the fabric. Pretty
simple. The photo shows the bottom-side of the tent already folded.
Note, for those who haven't read through the Mark-1 construction
posts, after applying the sealant, then the spreader tool, then folding
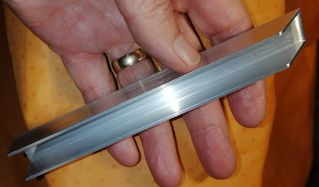
over the hem, I then use a "seam roller", shown in this photo from the
Mark-1 project (the cup has mineral turpentine):
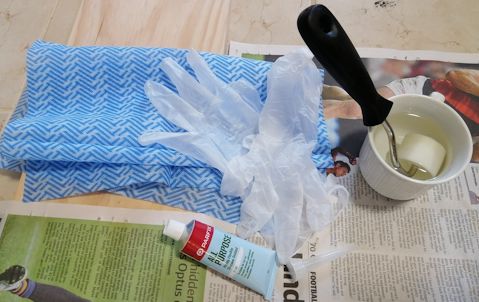
You could do it with your fingers, but the roller makes it easier to
roll-out the bubbles. The fabric is incredibly stretchy, so the roller
has to be rolled backwards and forwards over only a couple of inches,
progressing down the hem -- just rolling straight down the hem results
in warping of the fabric.
The roller is from Bunnings:
https://www.bunnings.com.au/uni-pro-30mm-seam-roller_p1662302
Another little detail, for anyone reading this who is interested in
giving it a go. Silicone banks up inside the spreader tool, and
obviously this is going to start to skin. So, what I do is clean it out
with a tissue after doing each hem line. And another detail: when
ejecting the sealant from the tube, apply it with a slight zigzag, which
might help the spreader tool to create a nice even film output.
A comment about glueing versus sewing: there is a misconception, that
I have read often on forums, that glueing makes the tarp/tent much
heavier than if sewed. Not so. It is a matter of doing it "properly",
only using enough glue and no more. My spreader tool ensures that.
In fact, a sewed tent may end up being heavier, as it has to to be
seam-sealed, probably using as much sealant as I use. Furthermore, hems
and ridges/joins have two (or more) folds when sewed, requiring extra
cloth, whereas I have just one on hems and no fold on ridgelines/joins.
I might as well also add, another misconception, that a glued tent is
not as strong as a sewn tent. Not so. In fact, the glued tent is likely
to be stronger. There are some places on the glued tent that do still
need to be sewn, such as attaching tie-out points.
...so, my little plug in favour of glued tarp/tent. Onward ho, will
glue the hems on the other piece tomorrow.
Tags: light