Construction of wheel knuckle hinges and learning to weld
Continuing the full-suspension solar electric tadpole recumbent trike project, this is the previous post:
https://bkhome.org/news/202312/construction-of-front-axles-for-custom-trike.html
...which describes modification of the front-wheel "knuckles" for a bicycle wheel with 20mm diameter shaft. I recently learnt the name for that part. Here is a photo of a wheel knuckle for a different trike project, made by Tony:
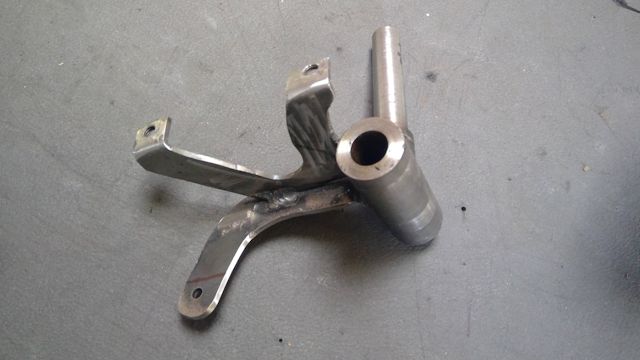
...I won't post the link, as it is from a private Facebook group. Tony is an Aussie, who built seven recumbent trikes, but now due to age has had to stop riding them. Tony's welding ability exceeds mine. The knuckle consists of the spindle for the wheel, the central "kingpin", and brackets for disk-brake calipers and steering linkage.
The go-kart kit that I purchased via Aliexpress is very cheaply
made, and the pivot-points are all very sloppy. If the hinges are
sloppy, then it will mean the wheels will have some "play" and
will wobble while in motion. This is bad for the handling and will
also cause fast tread wear.
So, I have been reducing the play in all the hinges. The knuckle came with a M12 bolt, whereas the kingpin tube that it slides into is about 13mm inside diameter. Actually, a tiny fraction over 13mm. To fix this, I bought some brass tube, 13mm OD, 12mm ID, 05mm wall thickness (from here), and slid a piece of it into the kingpin:
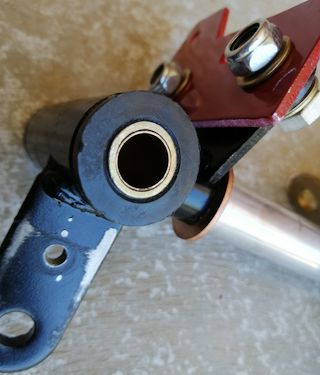
...fantastic, the bolt is now a snug, but not tight, fit.
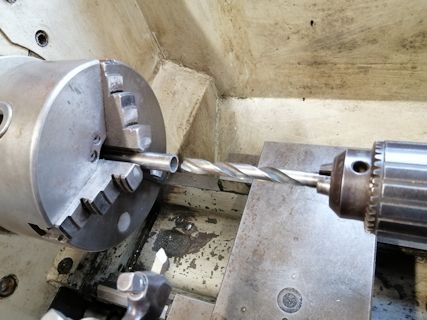
One detail: the kingpin tube, into which I slid the brass tube, has a raised seam its entire length. I took that out with a round file, before inserting the brass tube. Looking ahead to contruction of the swing-arms, to be described in a future blog post, the tubes were much longer and I took out the seam with a drill bit in a lathe:
The bolt was not quite long enough, so I bought one with a 120mm total shaft length and about 32mm thread length. Got it off eBay, with 1.25mm pitch fine thread:
https://www.ebay.com.au/itm/333361108883?var=542408508784
...that was the longest I could find, but still not quite long enough, as you should be able to make out from this photo:
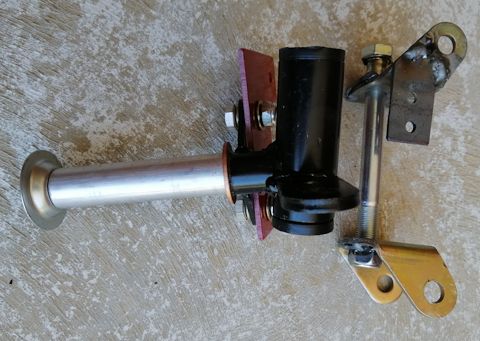
...the threaded part of the bolt is going through the U-piece and is another very sloppy pivot-point. To fix this, I welded a nut onto the U-piece, into which the bolt will screw. Also, at the other end, welded a small rectangle of iron, with a hole so as to grip the bolt more snuggly. Here are photos of the U-pieces:
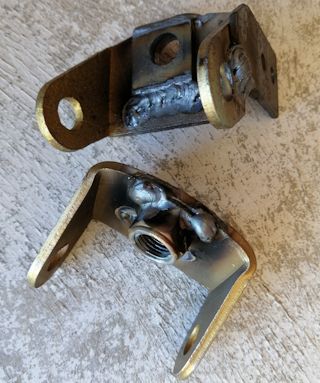
...the welding is not beautiful, but does the job.
Actually, I didn't do that welding, it was done by Terry. He is a retired school teacher who used to teach metalwork.
This is a workshop that I have joined, mostly retired guys, and today Terry was extremely helpful. He did the above welding with a MIG welder, and gave me instructions how to use it. I brought in my arc welder, and Terry gave me instructions how to strike a spark and get a nice weld-run. This is the arc-welder that I purchased a little while ago, in anticipation of needing it for the trike project:
https://www.ebay.com.au/itm/272834881672

...that helmet thing is useless, so also purchased an auto-darkening helmet:
https://www.ebay.com.au/itm/401641355188
I practised with this welder, but had great difficulty, mostly
because the rod sticks to the work-piece.
Today, Terry tested my welder with different rods, and we found one that strikes very easily; "CIGWELD Ferrocraft 21" 2.5mm diameter (see here). In fact, I was amazed how easily it struck and didn't stick. Amperage was set to 115A, and thickness of the workpiece is also a factor, so that particular rod worked well for that situation.
An extra note about the MIG welding that Terry did. He had difficulty with getting a bond to the U-pieces, which contributed to the messy appearance. We think that the coating is "yellow zinc" -- whatever, it was a problem.There will be some more welding required for this trike project,
and that is going to be mild-steel, so should be easy. In fact, I
should be able to handle it myself with the arc welder. Lots of
fun!
Tags: light
