
Alpine aarch64 chrootable rootfs
I posted awhile back how easy it is to create an Alpine musl-based chrootable filesystem folder:
http://bkhome.org/news/201704/alpine-x8664-chrootable-rootfs.html
At the time, I created i686, x86_64 and armv7 root-filesystems.
Now that I am embracing aarch64, want a rootfs for compiling static executables. Hence:
http://distro.ibiblio.org/quirky/alpine/aarch64/developer/
After expansion of the tarball, instructions are inside. You will of
course need to be running a aarch64 host OS, in my case on the new
Rock64 board.
I compiled squashfs-tools 4.3, and it needs a patch for musl:
For good measure, I also applied all the patches from Debian. My rootfs does not have zlib-dev, so had to install that:
# apk add zlib-dev
...the rootfs has the Alpine apk package manager in it.
Tags: linux
LittlevGL evaluation part 3
Progress! Parts 1 and 2 are here:
http://bkhome.org/news/201808/first-go-at-evaluating-littlevgl.html
http://bkhome.org/news/201808/tentative-first-step-framebuffer-with-littlevgl.html
I didn't know how to get the mouse working without X, so posted a question to the developer's site:
https://github.com/littlevgl/lvgl/issues/374
Now have a window with buttons, and a mouse! Furthermore, it is
compiled statically with uClibc and the executable is 217KB -- bigger
than it needs to be as have included more modules than actually used.
I used my fork of Landley's uClibc-based Aboriginal chrootable filesystem:
http://distro.ibiblio.org/easyos/project/aboriginal/
...follow the instructions, and you will end up with a filesystem folder that you can chroot into.
LittlevGL is the pc-simulator tarball, as explained in the earlier
posts. But first, the exciting part... I excited from X and executed
'demo":
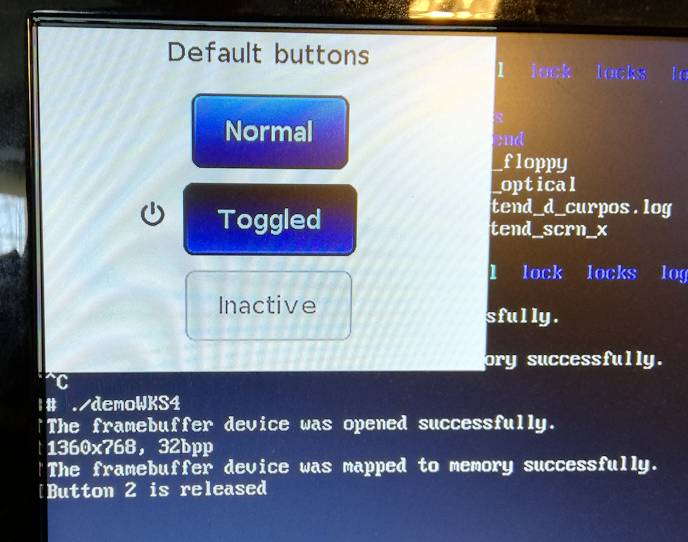
The "mouse pointer" is that little power-button symbol, don't yet
know how to create a proper image. I can move the pointer over a button,
click, and get output on the screen. Yay!
My changes to 'lv_conf.h':
#define LV_COLOR_DEPTH 24 /* BKColor depth: 1/8/16/24*/
Changes to 'lv_drv_conf.h':
#define USE_FBDEV           1
...
#define USE_EVDEV    1
Here is my 'Makefile':
#Here is my 'main.c':
# Makefile
#
CC = gcc
#CFLAGS = -Wall -Wshadow -Wundef -Wmaybe-uninitialized
CFLAGS = -Wall -Wshadow -Wundef
CFLAGS += -O3 -g3 -I./
#LDFLAGS += -lSDL2 -lm
BIN = demo
VPATH =
LDFLAGS = -static
LVGL_DIR = ${shell pwd}
MAINSRC = main.c
#LIBRARIES
include ./lvgl/lv_core/lv_core.mk
include ./lvgl/lv_hal/lv_hal.mk
include ./lvgl/lv_objx/lv_objx.mk
include ./lvgl/lv_misc/lv_fonts/lv_fonts.mk
include ./lvgl/lv_misc/lv_misc.mk
include ./lvgl/lv_themes/lv_themes.mk
include ./lvgl/lv_draw/lv_draw.mk
#DRIVERS
include ./lv_drivers/display/display.mk
include ./lv_drivers/indev/indev.mk
OBJEXT ?= .o
AOBJS = $(ASRCS:.S=$(OBJEXT))
COBJS = $(CSRCS:.c=$(OBJEXT))
MAINOBJ = $(MAINSRC:.c=$(OBJEXT))
SRCS = $(ASRCS) $(CSRCS) $(MAINSRC)
OBJS = $(AOBJS) $(COBJS)
## MAINOBJ -> OBJFILES
all: clean default
%.o: %.c
@$(CC) $(CFLAGS) -c $< -o $@
@echo "CC $<"
default: $(AOBJS) $(COBJS) $(MAINOBJ)
$(CC) -o $(BIN) $(MAINOBJ) $(AOBJS) $(COBJS) $(LDFLAGS)
clean:
rm -f $(BIN) $(AOBJS) $(COBJS) $(MAINOBJ)
#include "lvgl/lvgl.h"What we have now is a great jumping-off point for creating useful apps.
#include "lv_drivers/display/fbdev.h"
#include "lv_drivers/indev/evdev.h"
#include <unistd.h>
#include <stdio.h>
//Add a display for the LittlevGL using the frame buffer driver
void register_display(void)
{
lv_disp_drv_t disp_drv;
lv_disp_drv_init(&disp_drv);
disp_drv.disp_flush = fbdev_flush; //It flushes the internal graphical buffer to the frame buffer
lv_disp_drv_register(&disp_drv);
}
static lv_res_t btn_click_action(lv_obj_t * btn)
{
uint8_t id = lv_obj_get_free_num(btn);
printf("Button %d is released\n", id);
/* The button is released.
* Make something here */
return LV_RES_OK; /*Return OK if the button is not deleted*/
}
int main(void)
{
/*LittlevGL init*/
lv_init();
/*Linux frame buffer device init*/
fbdev_init();
// get a display
register_display();
// enable event input
evdev_init();
// get an input device like mouse
lv_indev_drv_t indev_drv;
lv_indev_drv_init(&indev_drv);
indev_drv.type = LV_INDEV_TYPE_POINTER;
indev_drv.read = evdev_read;
// lv_indev_drv_register(&indev_drv);
lv_indev_t * mouse_indev = lv_indev_drv_register(&indev_drv);
lv_obj_t * cursor_obj = lv_img_create(lv_scr_act(), NULL); /*Create an image for the cursor */
lv_img_set_src(cursor_obj, SYMBOL_POWER); /*For simlicity add a built in symbol not an image*/
lv_indev_set_cursor(mouse_indev, cursor_obj); /* connect the object to the driver*/
/*Create a title label*/
lv_obj_t * label = lv_label_create(lv_scr_act(), NULL);
lv_label_set_text(label, "Default buttons");
lv_obj_align(label, NULL, LV_ALIGN_IN_TOP_MID, 0, 5);
/*Create a normal button*/
lv_obj_t * btn1 = lv_btn_create(lv_scr_act(), NULL);
lv_cont_set_fit(btn1, true, true); /*Enable resizing horizontally and vertically*/
lv_obj_align(btn1, label, LV_ALIGN_OUT_BOTTOM_MID, 0, 10);
lv_obj_set_free_num(btn1, 1); /*Set a unique number for the button*/
lv_btn_set_action(btn1, LV_BTN_ACTION_CLICK, btn_click_action);
/*Add a label to the button*/
label = lv_label_create(btn1, NULL);
lv_label_set_text(label, "Normal");
/*Copy the button and set toggled state. (The release action is copied too)*/
lv_obj_t * btn2 = lv_btn_create(lv_scr_act(), btn1);
lv_obj_align(btn2, btn1, LV_ALIGN_OUT_BOTTOM_MID, 0, 10);
lv_btn_set_state(btn2, LV_BTN_STATE_TGL_REL); /*Set toggled state*/
lv_obj_set_free_num(btn2, 2); /*Set a unique number for the button*/
/*Add a label to the toggled button*/
label = lv_label_create(btn2, NULL);
lv_label_set_text(label, "Toggled");
/*Copy the button and set inactive state.*/
lv_obj_t * btn3 = lv_btn_create(lv_scr_act(), btn1);
lv_obj_align(btn3, btn2, LV_ALIGN_OUT_BOTTOM_MID, 0, 10);
lv_btn_set_state(btn3, LV_BTN_STATE_INA); /*Set inactive state*/
lv_obj_set_free_num(btn3, 3); /*Set a unique number for the button*/
/*Add a label to the inactive button*/
label = lv_label_create(btn3, NULL);
lv_label_set_text(label, "Inactive");
/*Handle LitlevGL tasks (tickless mode)*/
while(1)
{
lv_tick_inc(5);
lv_task_handler();
usleep(5000);
}
return 0;
}
Considering uGFX
I posted about a first hands-on with LittlevGL:
http://bkhome.org/news/201808/tentative-first-step-framebuffer-with-littlevgl.html
In an earlier post, there is a list of contenders for creating GUI apps that will run on the Linux framebuffer:
http://bkhome.org/news/201808/gui-creation-for-the-linux-framebuffer.html
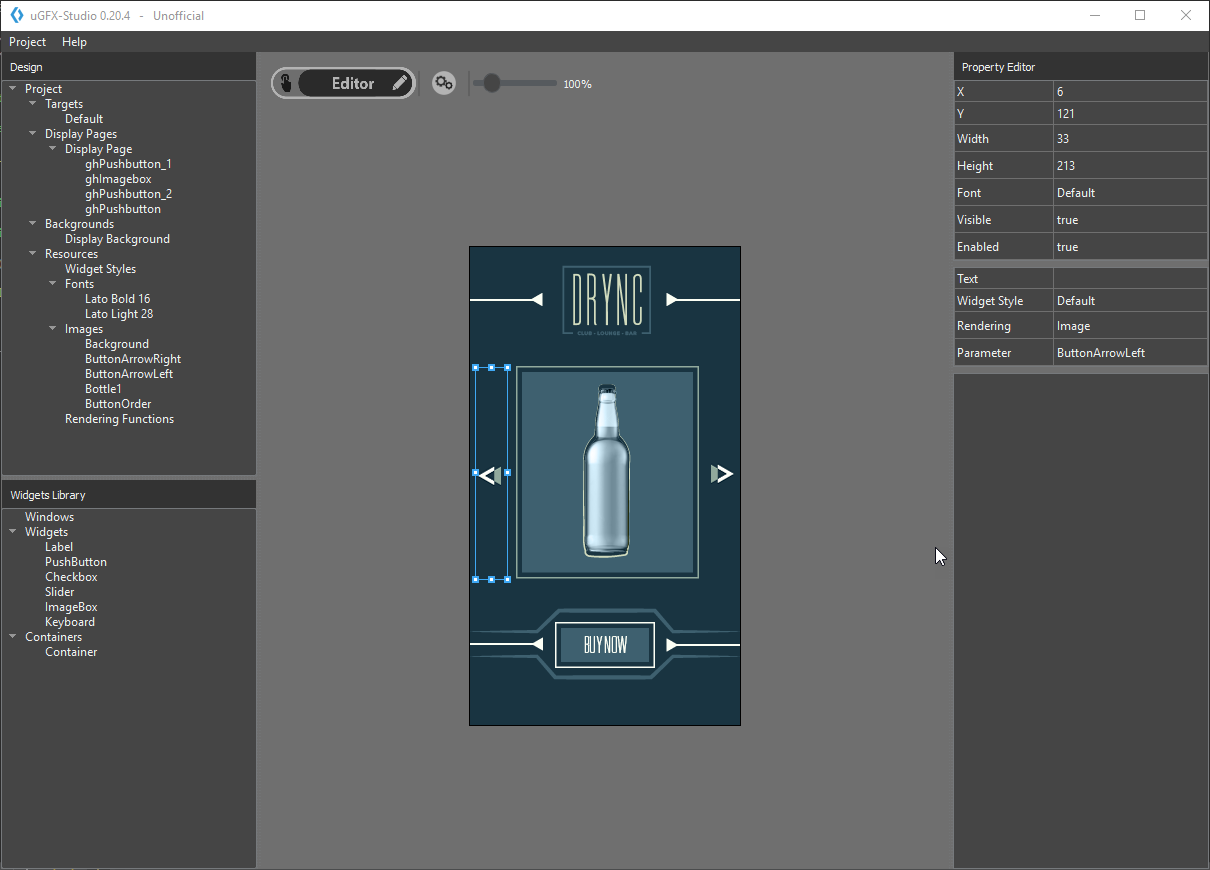
...in that post, I mentioned µGFX. Yeah, looks good. The intention now, is to have a hands-on with µGFX.
![]()
µGFX is commercial, open-source, free for personal and educational
use. I am OK with that. In fact, this kind of model might be more likely
to stick around into the future (unless the company gets bought by
Microsoft, and then dies -- that's a joke!). Also likely to be more
sophisticated and polished that a totally freebie product.
There is Quirky Xerus 8.6, built with Ubuntu DEBs, and that does have
32-bit libs available, however, I am moving away from that, in future
will likely focus on the Pyro series.
Does it matter that executables are 32-bit? Actually, no, as my
planned usage is to create static executables, and they will work on
both 32-bit and 64-bit systems, no shared libraries required. In which
case, there is an advantage to building 32-bit executables.
The easiest platform (for me) on which to evaluate µGFX will be a
i686 build of EasyOS, Pyro series. Compiling it right now. Might even
release it, for those who still need a 32-bit x86 distro.
Another preliminary impression of µGFX is of it's maturity and
capability -- the new beta 0.2 of µGFX-Studio is written using µGFX
libraries. It is a drag-and-drop GUI designer. This uses SDL2 and will
run on the desktop. Here is a forum thread:
https://community.ugfx.io/topic/843-ugfx-studio-v020-beta/
A comment about SDL2: it uses OpenGL for rendering, cannot use the Linux framebuffer. SDL1 can use the framebuffer. Unfortunate!
There is an active user community:
The online documentation looks good:
Project homepage:
Looks good, keen to try it!
Tags: linux
Tentative first step framebuffer with LittleVGL
As posted earlier today, I have started to evaluate LittlevGL:
http://bkhome.org/news/201808/first-go-at-evaluating-littlevgl.html
the "PC simulator" does look like a good starting point, though it is
setup to create a binary named "demo" that is linked against SDL2.
That's OK for learning, but I am aiming to talk directly to the Linux
framebuffer.
For EasyOS, SDL2 packages are available here (libsdl2-*):
http://distro.ibiblio.org/easyos/amd64/packages/compat/oe/pyro/
Download the pc-simulator zip file:
https://littlevgl.com/download
Direct link to version 5.1.1:
https://littlevgl.com/download/pc_simulator_v5_1_1.zip
Expand the zip file, and this is what you see:
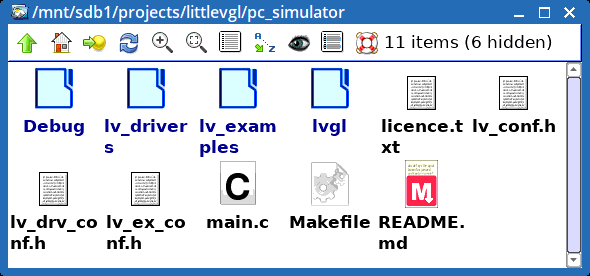
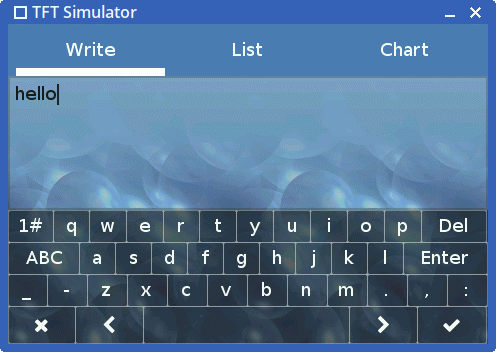
Open a terminal, and type "make". That's it, a binary named "demo" will be created. Run it "# ./demo", and you get a GUI:
There is another tutorial web page that explains how to create a simple
"Hello World" app using the Linux framebuffere, so onto that...
Hello World with Linux framebuffer
There is an introduction and tutorial here:
https://littlevgl.com/blog/23/embedded-gui-using-linux-frame-buffer-device-with-littlevgl
I fiddled around for awhile. Like the "PC Simulator" tutorial page, there is a conceptual-gap in the instructions. Here:
2. Compile the code and go back to character terminal mode
...er, how to compile it? For a beginner, this is an awkward step. A Makefile is needed. These are the steps that I followed:
- Run "make clean"
- In the 'pc-simulator' folder, I moved 'lv-conf.h', 'lv_drv_conf.h', 'lv_ex_conf.h', 'main.c' and 'Makefile' elsewhere.
- I then created new 'lv_drv.h', 'lv_conf.h' and 'main.c' as per instructions in the above URL.
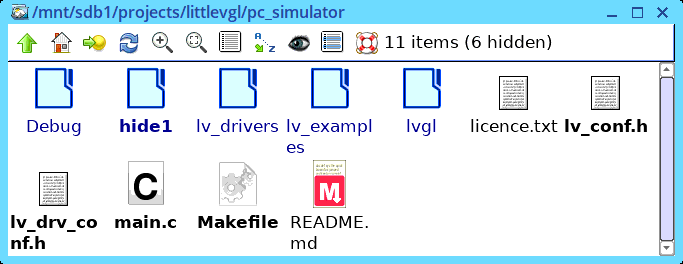
- I copied-back the 'Makefile' that I had previously moved away, and
edited it. Snapshot of the files, 'hide1' is where I moved the original
files to:
Here is my edited Makefile:
#
# Makefile
#
CC = gcc
CFLAGS = -Wall -Wshadow -Wundef -Wmaybe-uninitialized
CFLAGS += -O3 -g3 -I./
#LDFLAGS += -lSDL2 -lm
BIN = demo
VPATH =

LVGL_DIR = ${shell pwd}

MAINSRC = main.c

#LIBRARIES
include ./lvgl/lv_core/lv_core.mk
include ./lvgl/lv_hal/lv_hal.mk
include ./lvgl/lv_objx/lv_objx.mk
include ./lvgl/lv_misc/lv_fonts/lv_fonts.mk
include ./lvgl/lv_misc/lv_misc.mk
include ./lvgl/lv_themes/lv_themes.mk
include ./lvgl/lv_draw/lv_draw.mk

#DRIVERS
include ./lv_drivers/display/display.mk
include ./lv_drivers/indev/indev.mk

OBJEXT ?= .o

AOBJS = $(ASRCS:.S=$(OBJEXT))
COBJS = $(CSRCS:.c=$(OBJEXT))

MAINOBJ = $(MAINSRC:.c=$(OBJEXT))

SRCS = $(ASRCS) $(CSRCS) $(MAINSRC)
OBJS = $(AOBJS) $(COBJS)

## MAINOBJ -> OBJFILES

all: clean default

%.o: %.c
	@$(CC)  $(CFLAGS) -c $< -o $@
	@echo "CC $<"

default: $(AOBJS) $(COBJS) $(MAINOBJ)
	$(CC) -o $(BIN) $(MAINOBJ) $(AOBJS) $(COBJS) $(LDFLAGS)

clean:
	rm -f $(BIN) $(AOBJS) $(COBJS) $(MAINOBJ)
I do realise that more modules than are needed, are being included in
the build, but that's OK, as I plan to play with adding more widgets.
Notice that SDL2 is not being linked.
Run "make", it creates 'demo'. This will not run on the Xorg desktop,
though I vaguely recall a method of doing it in a terminal. Anyway, the
way to test 'demo' is to exit from X, via the Shutdown menu in EasyOS
(and most pups). Then, on the commandline, as long as a framebuffer has
command of the screen, which is likely (there are some caveats), just
execute 'demo', where-ever it is.
On the commandline, here is what it looks like:

That's as far as I've got. Next, need to investigate mouse support...
LVGL evaluation Part-3 here:
http://bkhome.org/news/201808/littlevgl-evaluation-part-3.html
Tags: linux
First go at evaluating LittlevGL
As posted about a couple of days ago on this blog, I have an
interest in creating small GUI apps that will talk directly to the Linux
framebuffer. Here is the post:
http://bkhome.org/news/201808/gui-creation-for-the-linux-framebuffer.html
I tentatively narrowed the choices down to LittlevGL, uGFX and Nuklear. LittlevGL looks great, so giving it a go. The website:
https://littlevgl.com/
The "PC simulator" looks like a good starting point:
https://littlevgl.com/pc-simulator
...so, I followed the instructions. Installed Eclipse IDE, etc. Got to this part:
Now you are ready to run the Littlev Graphics Library on your PC. Click on the Hammer Icon on the top menu bar to Build the project. If you have done everything right you will not get any errors. Note that on some systems additional steps might be required to "see" SDL 2 from Eclipse but in most of cases the configurtions in the downloaded project is enough.
After a success build click on the Play button on the top menu bar to run the project. Now a window should appear in the middle of your screen.
Now everything is ready to use the Littlev Graphics Library in the practice or begin the developement on your PC.
...er, no, that didn't work. Yeah, the "Hammer Icon" part is OK, it
reported a successful build, however, the "Play" button did nothing.
Searched the source, couldn't find the compiled files anywhere. Hmmm...
It turned out, the instructions are incomplete, extra steps are required, as explained on YouTube:
https://www.youtube.com/watch?v=ZzLdct2ymvg
However, decided to start again, from scratch. I was not drawn to the
Eclipse IDE, it seemed unnecessarily complex, and bloated, requiring
Java JRE. Will attempt to do it from a terminal only.
To keep a clean separation, will create another blog post...
LVGL evaluation Part-2 here:
http://bkhome.org/news/201808/tentative-first-step-framebuffer-with-littlevgl.html
Tags: linux
GUI creation for the Linux framebuffer
For a long time I have wanted some means of creating very small
GUI apps that are statically compiled and work directly with the Linux
framebuffer. The use would be for a GUI app in the initramfs.
I recently discovered LittlevGL, and then decided to ask for the
opinion of two guys who are real experts in this field, 'technosaurus'
and 'goingnuts' (their Puppy Forum names).
https://littlevgl.com/blog/23/embedded-gui-using-linux-frame-buffer-device-with-littlevgl
I sent a pm on the Puppy Forum to technosaurus, and he responded:
littlevgl has been on my radar for a while now - I
do like it, but its no gtkdialog replacement; you can see more of my
projects of interest at https://github.com/technosaurus?tab=stars
I am in the process of moving from near Houston, Texas to near Kansas
City, Missouri (U.S.) We have moved 3 times in 3 years so I have not
been coding for some time - just reading/analyzing code for future use
(thus all the starred projects, but few commits)
Besides littlevgl, the ones I know of that will work for the framebuffer (and X) are:
https://github.com/vurtun/nuklear forum thread here
https://github.com/memononen/nanovg + oui/blendish
https://github.com/ImpulseAdventure/GUIslice (uses SDL)
https://github.com/grz0zrg/fbg (lacks widgets)
more gtkdialog-like:
http://lcui.org/ some largish dependencies (libpng,libjpeg,
libxml2,freetype,fontconfig)
http://tekui.neoscientists.org/ possibly unmaintained and needs freetype and lua - uses any raw framebuffer (or X11 depending on configuration)
Some notes.
For the ones that use opengl (or GLES) a specially built Mesa is needed
and some framebuffer drivers are not supported because they lack support
for kernel mode setting (unfortunately no one has ported Fabrice
Bellard's tinygl as a fallback)
littlevgl seems to be a retained mode GUI like gtk and kde (but seems to
be simplified so that you need ~1/3 less code than gtk and without the
huge overhead of c++ and qt) There is a template here and it seems to be targeted to Linux with growing driver support
nuklear and nanovg are immediate mode GUIs which cater toward game
development and tend to use more CPU, though nuklear appears to have
addressed this since I last tested it. However, since they are single
header files, anything unused will get compiled out so they make small
binaries.
https://bitbucket.org/duangle/oui-blendish/src
GUIslice could be a good compromise since it uses SDL (1.2 or 2.x) which
will handle the framebuffer (or X) for you. It isn't as pretty though -
basically an improvement on curses.
I was aware of Nuklear, and did look at it briefly a year or so ago.
Here is another one, uGFX:
This is a commercial product, free for "home, hobby and educational"
use. It is an open source project, and will work with sdl or directly
with the framebuffer. Git project site:
Tags: linux
Nheko Matrix chat client
Purism are using Matrix for chat forums, including for the Librem 5 phone:
https://developer.puri.sm/Contact.html#matrix-chat-rooms
So, decided to give it a go. There are various Matrix client apps, and I compiled Qt5-based Nheko:
The PET for EasyOS 0.9.5+ (not yet released) is here:
http://distro.ibiblio.org/easyos/amd64/packages/pet/pet_packages-pyro/nheko-0.5.1-pyro64.pet
Dependencies are 'olm', 'libsodium', 'liblmdb', which are also PETs.
Also 'boost' version 1.66, which is in the upcoming Easy 0.9.5.
Nheko, at startup, offered to register, where a username, password,
and "Home Server" can be entered. For the latter, I entered
"matrix.org", and a captcha came up in the browser to verify that I am a
human.
After starting Nheko, I was in my own "room",
"@<myusername>:matrix.org", but unable to change out of it. Nheko
is lacking some features, but is under rapid development.
I logged in at the online browser Matrix client:
Logged in, I was able to ratify a user-agreement, that then allowed
changing rooms. I was also able to personalize my account, with email
and avatar, which cannot be done in Nheko.
Started up Nheko, logged in, then hit the "+" icon and was able to
change rooms. Chose "#community-librem-5:talk.puri.sm", and yay, there
it is!
Hmmm, perhaps it is easier just to use the online client.
Devuan package repositories
I mystery. I am getting woofQ setup for building from Devuan DEB
packages. There used to be a 'merged' directory, which I think had all
of the specially-modified non-systemd DEBs, plus everything else from
the Debian repo.
However, looking in the Devuan repo for the latest release, Ascii
(2.0), which is based upon Debian Stretch (9.0), the 'merged' path is,
well, not merged.
It seems that we have to get the Devuan-modified DEBs from the Devuan repo, and the rest from the Debian repo.
Here is a mirror of the Devuan repo:
http://mirror.vpgrp.io/devuan/pool/main/
...look in folder 'a', no 'abiword' (for example).
To get abiword, we have to go to the Debian repo, for example here, look in 'a':
http://http.us.debian.org/debian/pool/main/
Some guys have been creating Devuan-based Puppies. Forum member musher0 did a Jessie-based Devuan:
http://murga-linux.com/puppy/viewtopic.php?t=107913
Forum member Sailor Enceladus did a Ascii-based Devuan:
http://murga-linux.com/puppy/viewtopic.php?t=109842
EDIT:
The light has come on. The package database at merged/dists/ascii/binary-amd64/Packages.xz has everything, the Devuan and the Debian DEBs. In the field that has the path to the DEB, there is "pool/DEVUAN/..." or "pool/DEBIAN/...", and the online repository at merged/pool/main has a server rewrite rule, that redirects to wherever the DEB actual is.
Tags: linux