
DC-DC charger issues and powerbox improvements
Ha ha, I am an inveterate tinkerer -- in the sense of always
wanting to experiment, modify and improve whatever I have designed and
constructed. In fact, the journey is often as much or more fun than the
destination. Camping, for example -- preparing for camping is as much
fun as actually going camping.
Nice sunny day, so this morning took the powerbox outside and
connected the Atem Power "250W" solar panel. Yes, it does charge, but
there are two serious issues. I have sent an email to iTECHWORLD
technical support, and will await their response before deciding if
these "issues" can be described as faults. Stay tuned for developments.
The previous blog post for this powerbox project:
https://bkhome.org/news/202004/installation-of-the-coulometer-lcd-display.html
In earlier posts, I have identified some limitations in the physical
design of the powerbox and the wiring layout. Decided to fix them,,,
Getting at those battery terminals is just too awkward and dangerous.
The top-plate of the box is screwed on from the underneath. In
retrospect, this was dumb, but there was a reason originally -- wanted
to place the DC-DC charger flat on the top of the box, without
protruding screws getting in the way.
Screwing from the top allows the screws to be removed and top panel
lifted off. This allows access to the battery terminals. So, I pulled
off all of the side panels, removed the screws holding on the top panel:
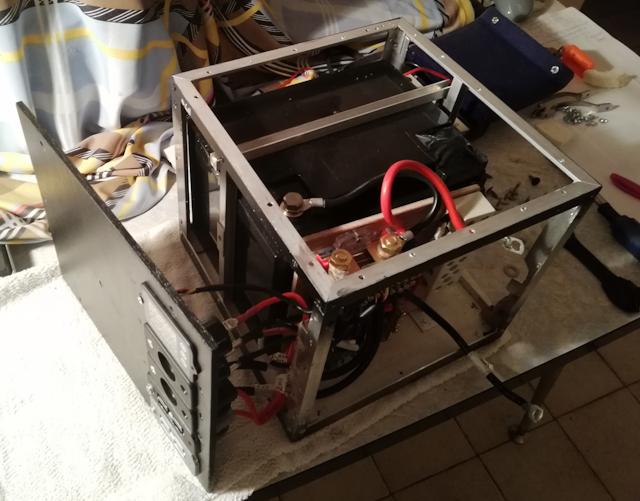
...yay, easy access to the battery terminals. You can't see the
positive terminal in the photo, as it is covered with black electrical
tape.
Late night right now, tomorrow will apply screws from the top. It
will be easy to remove them and lift up the top panel any time it is
desired to access the battery terminals, or anything else.
Another problem is that extra terminal block just floating there, looking messy, see this earlier snapshot:
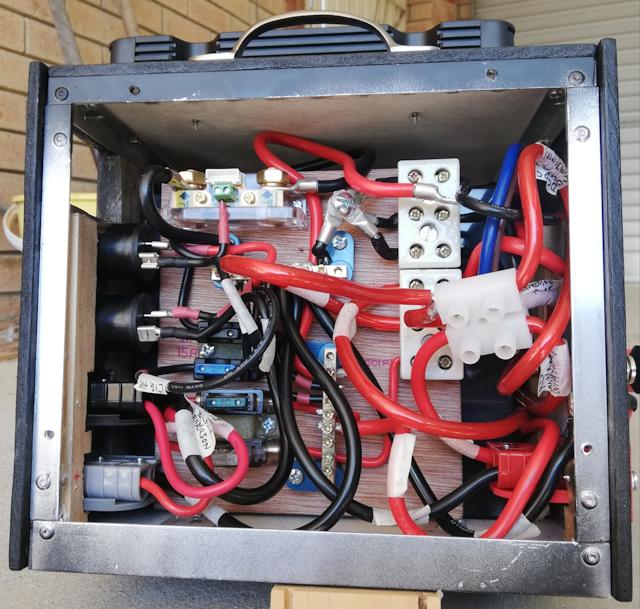
Another task for tomorrow will be replacement of that floating
terminal block with a small busbar mounted on the spare space on the
wiring-board. And a bit of a tidy-up of the wiring.
EDIT 2020-05-02:
The top plate has been modified, with screws on the top, so that it can be opened up. I have edited the original blog post:
https://bkhome.org/news/202004/top-plate-of-lithium-powerbox.html
To get rid of that floating terminal block, I
have installed "protected +bus", using one of the 8-way busbars from
Jaycar, though (currently) only need three ways:
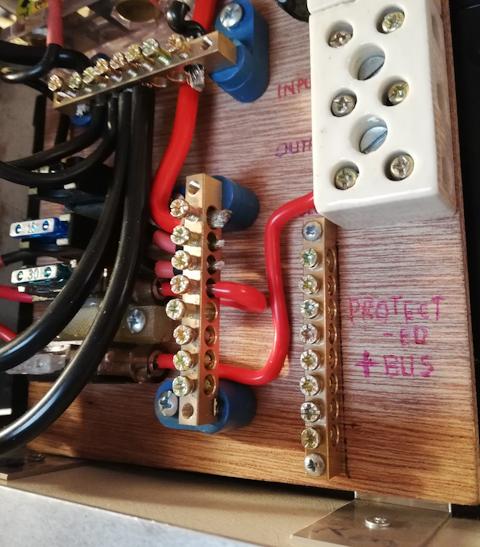
"+bus" is connected directly to the battery
positive terminal, whereas "protected +bus" is on the other side of a
30A circuit breaker. Or rather, is, once it is wired up:
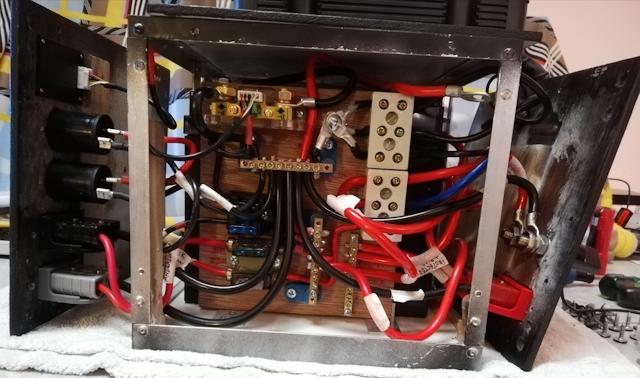
And, after screwing the front and back panels into place:
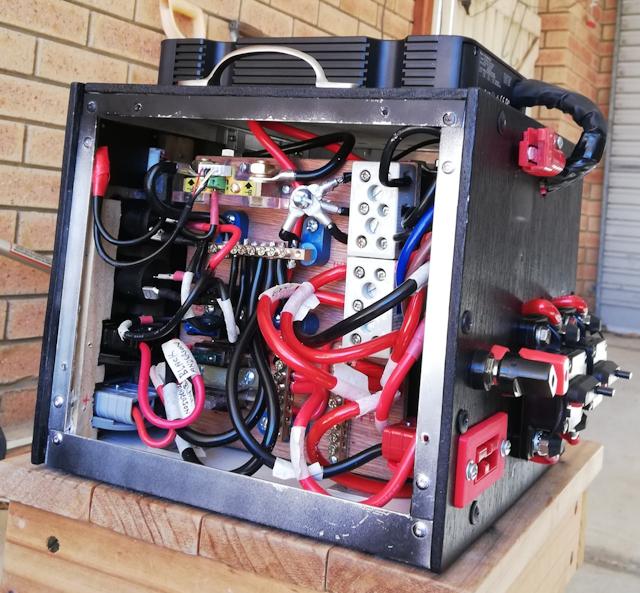
That is better. It is still crowded of course, but that was part of the exercise, to build a very compact powerbox.
Tags: nomad