
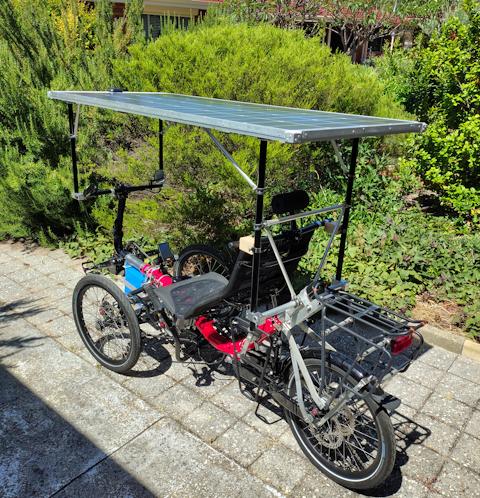
Install auxiliary solar panel in custom trike
Continuing the solar-assisted custom recumbent tadpole trike project, I am now at the stage of outfitting it for a proposed first tour. The previous blog post in this project, introducing the auxiliary solar panel:
- Testing auxiliary solar panel with custom trike — December 30, 2024
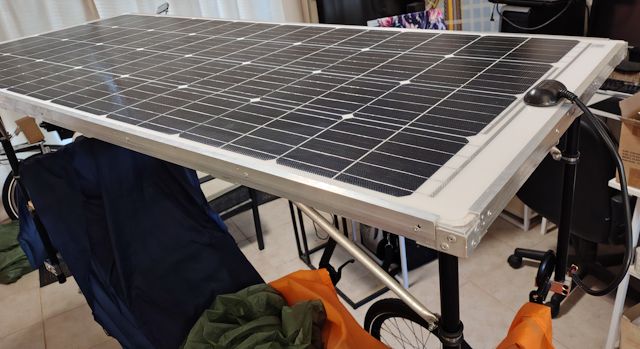
The challenge was to find somewhere to put it on the trike. The folded panel is 340x525 mm, which is just right, and the reason why I chose this particular panel. Pop-riveted some angle for it to sit on:
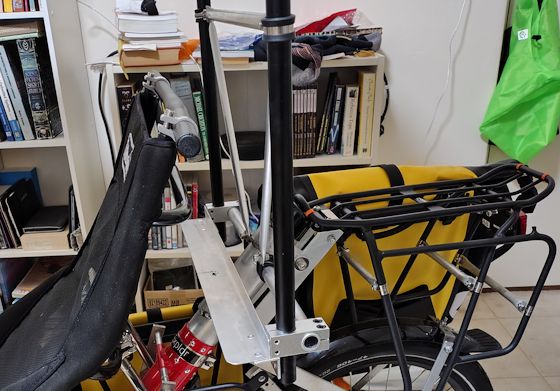
...however, had to remove the head-rest, which solved one problem but introduced another. If I had the forethought that an auxiliary solar panel had to be accommodated, back when designing the trike framework, could have placed those vertical black poles supporting the overhead solar panel back a bit. But, have to live with the current situation and remove the head-rest.
The auxiliary panel fits nicely:
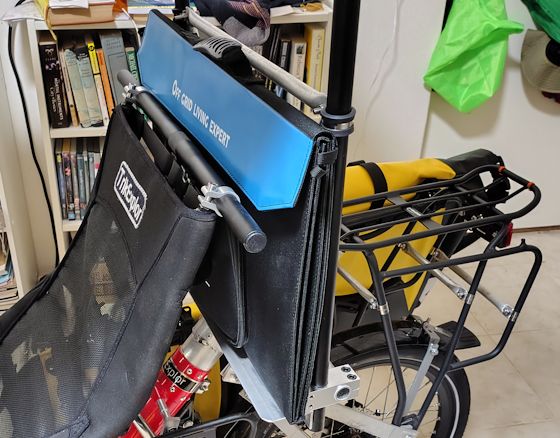
There are constraints above and below. Below, there are panniers that require sufficient room to open and put stuff in and out. And above, there will be a relocated head-rest; also the eye-height must be above the auxiliary panel for looking backwards.
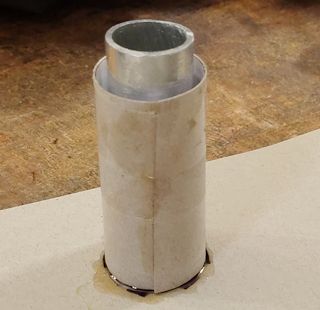
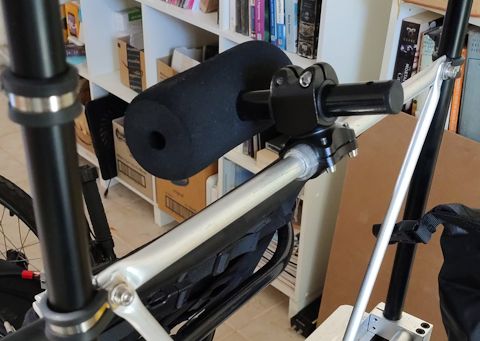
There is aluminium tube just behind the auxiliary panel, to which the head-rest will now be attached; however, the diameter is too small. Needed to manufacture a "pipe-shim", and it just so happens that I have a very short piece of aluminium tube with ID that matches; just need to bulk it out to the required OD. Manufactured the shim with epoxy resin:
 |
 |
...two concentric rings, tipped-in epoxy resin, afterward cut it down the middle with a hacksaw. Note that I used "Utility" brand epoxy from Bunnings, as it is very slow setting. Also considerably cheaper than the other brands. Needs to be mixed thoroughly beforehand, and sets very hard. This Utility product does have a downside; it leaks after usage:
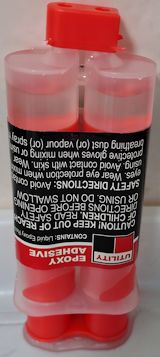
...24 hours after usage, a puddle is forming. Lots of complaints about this on the Bunnings website. I haven't tried storing it flipped with nozzles at bottom.
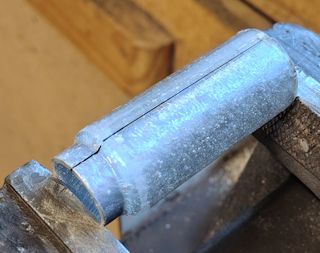
Anyway, here are the two pieces of the shim:
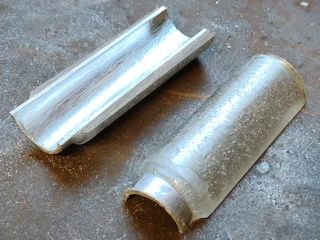
...why not make the shim entirely out of epoxy? My reasoning at the time is the aluminium inner makes it easier to grip in the vice, for sawing in half. Yes, that went well.
Wrapped a couple of layers of wide electric tape around the aluminium tube, to give the shim something to grip onto, then mounted the head-rest:
The auxiliary solar panel fits nicely:
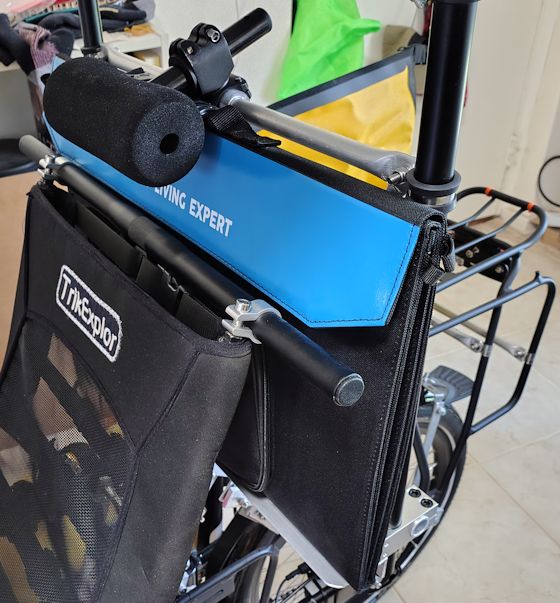
...there is also enough room in front of the solar panel for the extension cable. I've got a 5.5 metre length that fits in there nicely also. Using "6mm auto" cable, described in blog posts in 2020:
- Cable and soldering guidelines — April 27, 2020
- Cable sizes for battery camping system — April 11, 2020
Tomorrow, intend to build a box to sit on the rear luggage rack.
It has to be narrow, so that the panniers either side can be fully
loaded.
Tags: light
Testing auxiliary solar panel with custom trike
Briliant blue sky this morning, 10.15am, December 30, mid-summer here in Perth, Western Australia. As mentioned in the previous blog post, the intention when at a camp-site is to keep the trike under shade (if available), with the throw-over tent. There will be a cable to small solar panel in the sun to keep the battery topped-up. Previous post:
- Throw-over tent for custom trike — December 29, 2024
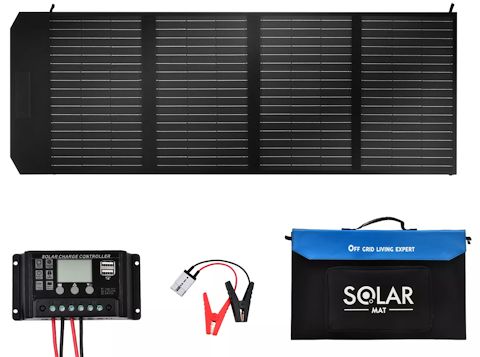
The problem, though, is where to mount an extra solar panel on the trike? Found a place where a folding panel could fit, then looked around for one that will be within those dimensions. So, selected a panel based on restricted size, not capacity. But, it turned out remarkably well. This is what I purchased, for AU$169:
https://www.ebay.com.au/itm/294677489161
Ha ha, what a joke; it is advertised as "300W". I was amused in
one of the comments, someone complained that they bought it
because they expected 300W or near. Naive! You have to know that
many vendors tell lies, and estimate power output from surface
area of the panel. The vendor also claimed "grade-A
monocrystalline", which I also doubted, but after testing the
panel; yes, high-efficiency cells.
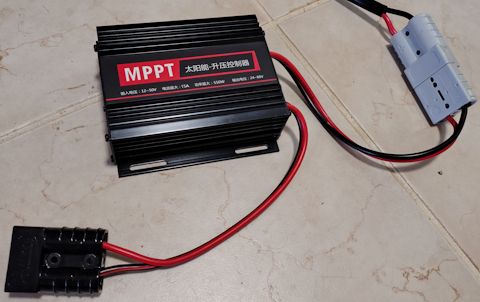
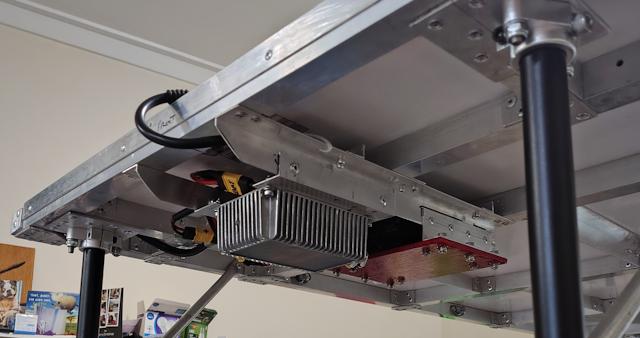
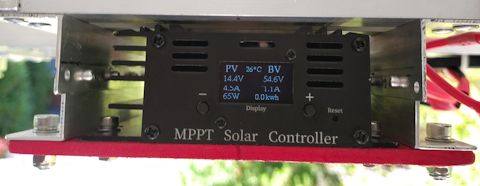
To connect the auxiliary solar panel, an MPPT controller is required (I threw away the PWM controller that came with the solar panel). Instead of unplugging one that is used for the main solar panel, used the extra one that I had purchased, this one:
https://www.aliexpress.com/item/1005007612832046.html
...it was AU$48 when I purchased it, now gone up a bit; but the AU Dollar has fallen compared with US Dollar. The reason I purchased this was due to curiosity, after having purchased the Lensun MPPT controller:
- MPPT controller for custom trike — September 13, 2024
...the MPPT controller direct from China was less than half the price. Today, finally tested it, and it works great. I attached Anderson connectors:
Plugged into the "48V" lithium battery:
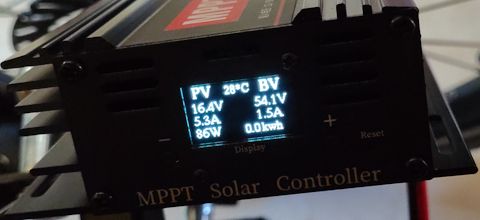
Good result; 86W, more than I expected!
Also useful while touring and stopped for awhile, can get out the auxiliary solar panel and have two panels charging the battery, while eating lunch or whatever.
EDIT:
Found another alternative to the Lensun MPPT controller. This
is a brand-name product, with English printed on the
controller (and the User Manual is probably in English also).
Also cheaper, AU$48 postage-free:
https://www.aliexpress.com/item/1005008269117932.html
Looking around on Aliexpress, also
discovered there is another variant with a maximum input
voltage of 65V (the above is 50V).
Tags: light
Throw-over tent for custom trike
Continuing the custom recumbent trike project, here are recent posts:
- Safety fixture for trike pedals — December 26, 2024
- Custom trike project front page — December 21, 2024
- Trike test elejoy MPPT controller — December 10, 2024
Currently planning the details for going touring with the trike.
It is envisaged at a campsite, the trike will be parked in the shade, and I will use a small folding solar panel to keep the battery topped up -- more on that in a future blog post. While at a campsite, or for whenever there is rain, I constructed a throw-over tent. I have left-over 10D ripstop silnylon fabric from the tent-making days in 2021, and one long piece of orange fabric:
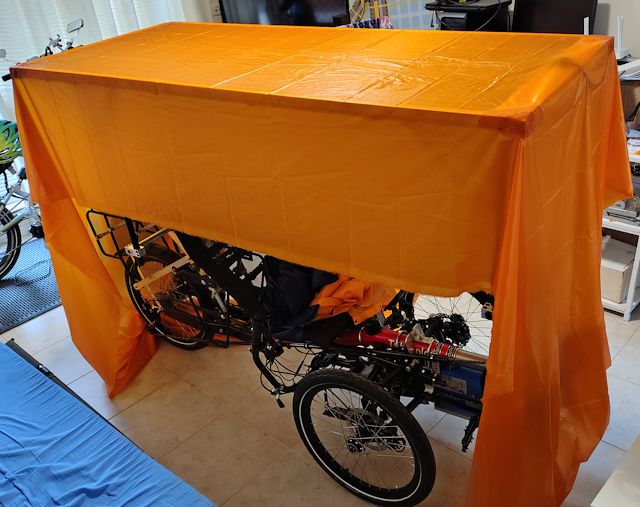
This tent is contructed entirely by glueing, no sewing. Sewing 10D silnylon is a nightmare; so incredibly stretchy and slippery.
I described the glueing technique back in 2021, for example here:
"TreeHugger 1P tarp weighs only 178g"
https://bkhome.org/light/treehugger-1p-tarp-weighs-only-178g.html
Proceeded to add sides and tie-outs:
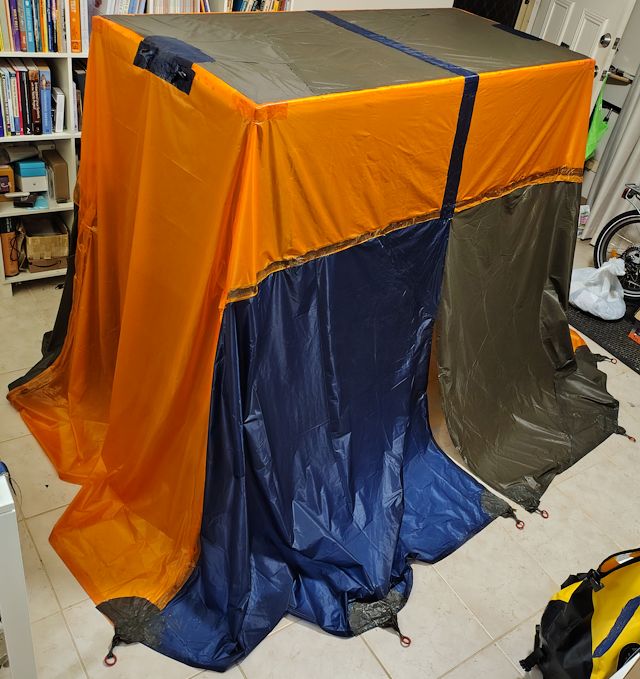
...photo taken in my loungeroom. At a campsite, the area required for pegging is large but that is not usually a problem. Pulling it out with pegs is important for a couple of reasons. One, so that wind will tend to flow over. Two, to give some room inside.
The 10D silnylon is translucent, so put an extra layer on top to cut down light getting through to the solar cells. 10D is very thin, a tent specialist fabric. I bought most of it in 2021 off Aliexpress, but that vendor is no longer in business. Searched Aliexpress, could not find silicone both-sides ripstop nylon fabric -- the closest is silicone one side, PU the other.
Silnylon is very special. It is silicone impregnated, right through, not just a coating on the sides. It bonds extremely well to silicone sealant. PU does not. It looks like tent manufacturers are not using silnylon anymore; the main reason, if I recall rightly, is that is stretches when wet.
Back in 2021, I did buy some pure 10D silnylon from a company in Europe, and I just now checked; yes, they still have it:
https://www.adventurexpert.com/product/10d-silnylon-fabric/

For anyone thinking of building a tent, 10D is a bit fragile; I
would recommend go for fabric a bit stronger, say 20D. Unless you
need the lightest possible weight and small size.
I manufactured the tie-outs the same way as the mark-3 tent in 2021:
- TreeHugger Mark-3 tent hem tie-outs — August 29, 2021
And used 30x5 (30mm OD, 20mm ID) silicone o-rings, from Aliexpress:
https://www.aliexpress.com/item/1005001460667252.html
The tent might need some further construction, but for now ok to
use on the first tour.
Tags: light
Safety fixture for trike pedals
I have posted previously about the dreaded "leg suck", when a foot falls off a pedal onto the road surface while travelling. Knowing me, this is a potential issue, as when touring, hour after hour, I will tend to become dreamy, lose attention. Most recumbent trike riders don't bother with pedal safety fixtures, but I want them, and that has been a bit of a saga.
I posted about bicycle shoes with cleats, that clip onto the
pedals. This also requires special pedals. That post was in May
2023
- How to be safe on a recumbent trike — May 18, 2023
So, I bought mountain bike pedals and special shoes with cleats.
I'm a beginner at all of this, and after further research, discovered that there is a fundamental difference how the feet should be placed on the pedals when riding a recumbent bike/trike compared to an upright bicycle. To look after the tendons in the feet, and for long distance comfort, on a recumbent trike the central shaft of the pedal should be in the arch of the foot. On bicycles, it is more toward the front of the foot, the ball.
There is lots of online advice about foot placement on the pedal, for example, here.
This means that the cleat on bicycle shoes is in the wrong place. This is important for long distance touring, so abandoned cleats and those shoes and pedals are now stored in a closet.
After further online research, I discovered what could be called the "Rolls Royce" of safety pedals for recumbent trikes. Which I purchased, see post July 2024:
- Foot and leg safety on a recumbent trike — July 10, 2024
...terrible price!
Unfortunately, these also ended up in the closet. They are very big, designed to take very large shoes, which is a serious problem on my trike. My customized trike has the wheels moved closer together, with total trike width now only 740mm. This imposes a restriction on the turning radius, and those safety pedals are just too wide. I have considered a future project to replace the front 20 inch wheels with 16 inch, but for now have to live with the current situation.
Yes, can turn with the pedals in a certain position to allow a sharper turn, and I could probably train myself to do that when cornering.
Another problem with those pedals is they are very heavy. They have weights underneath, so when your foot is not inserted, they stay upright. Each pedal weighs just under 1kg. I recently thought about selling them, but saw on a local trike Facebook group, someone else has them for sale, asking AU$50. Hey, I paid AU$245! For now, they are also residing in the closet.
I purchased some straps, that can be fitted to ordinary pedals. Actually, intended for a certain type of pedal. Actually bought a couple of different types:
https://www.aliexpress.com/item/1005002192895075.html
https://www.aliexpress.com/item/1005005528714005.html
...still the fundamental problem that they are designed for a bicycle, with pedal shaft more forward under the foot. However, ended up using the leather straps of that last purchase.
Enough throwing money at trying to find a solution. Yesterday, looked at the original pedals that came with the trike, and figured out a simple foot restraint system. Today went to the men's shed and built it...
Very simple, a short length of 30x3 mm aluminium strap with some angle on the bottom end:
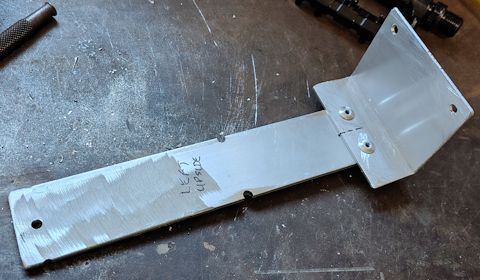
That is a snug fit into the bumps underneath the pedal:
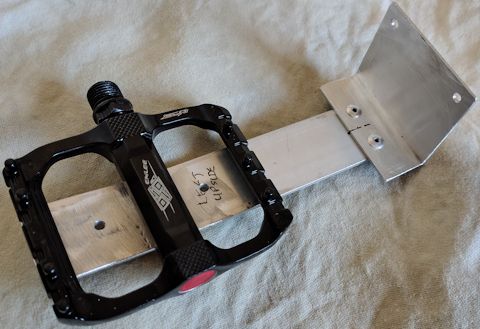
And a bracket to stop it from falling off:
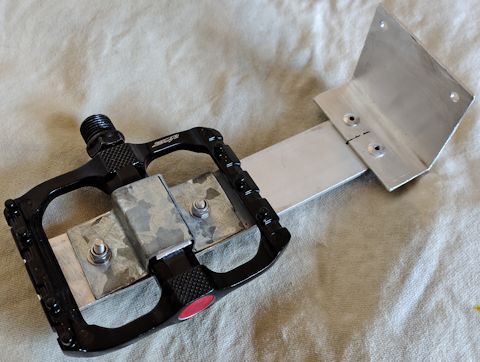
When touring, there is never a need to put the feet on the ground. Unlike a bicycle, where you can get into serious trouble with cleats if they don't unclip reliably. So, I can go one step further, and optionally restrain the feet with straps (the ones purchased earlier from Aliexpress):
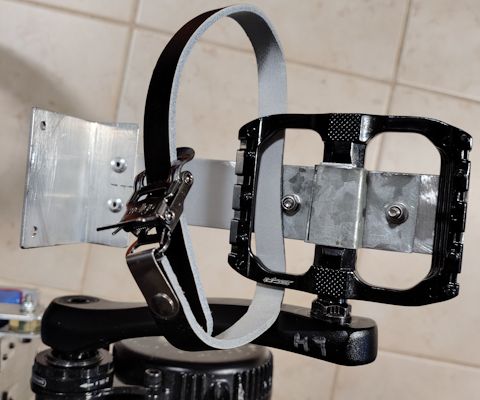
...the strap is a quick-release type, and there are various places it can be fed through the pedal to secure the shoe.
Simple DIY solution.
Tags: light
Custom trike project front page
I have created a "front page" for the custom solar-assisted full-suspension tadpole recumbent trike project:
https://bkhome.org/nomad/solar-powered-recumbent-trike.html
As noted at the bottom of that page, this is likely to be an ongoing project. Depends on my motivation of course, whether to keep working on it. Right now, as-is, it is usable, and I would like to get it outfitted for a multi-day tour. Depending on the level of satisfaction of the first tour will determine whether motivated enough to keep working on it.
It sure has been a fascinating project. I joined a "men's shed"
which has been a great experience. There are over 1,200 men's
sheds in Australia, see here.
Tags: light
Survival water filter
Getting the gear together to pack into the panniers on the custom recumbent trike, came across a water filter kit that I had purchased early 2021, from Aliexpress:
https://www.aliexpress.com/item/32666647306.html

Yeah, will pack that, could be a life-saver in an emergency situation. Decided to make some little improvements. The Miniwell supports reverse-flow to clean it out, so you could connect the outlet-side to a mains tap and flow clean water in reverse direction. It will give the filter a new lease on life, but not perfect, so I thought about a little pre-filter to prevent largish particles from traveling down to the filter...
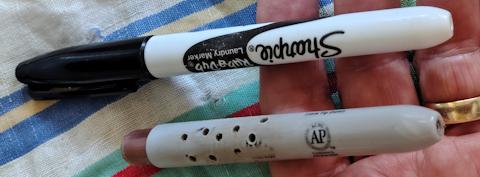
Discovered that a Sharpie felt pen is a perfect friction fit into the coupling that goes through a hole in the top water bag. So, modified one, with internals removed and holes drilled in the side:
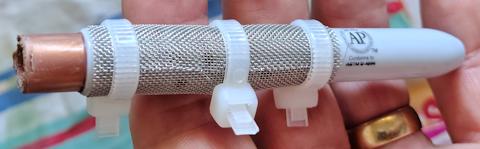
Purchased some fine stainless steel mesh a couple of years ago, for another project, "50mesh", from eBay:
https://www.ebay.com.au/itm/285049006213?var=586887237952
...the vendor sells "100mesh"; I don't know what that means, perhaps 100 squares per inch. Very fine, but I have used what already own. Mesh wrapped around the pen:
Just happen to have a silicone end-cap that is the right size, a snug fit to seal the left-side of above photo. Here it is inserted into the Miniwell module:
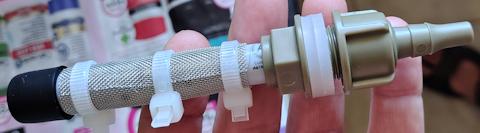
The whole thing can easily be pulled apart for cleaning. On the bottom-end, the filter, I screwed top of a soft-drink bottle, with holes, to tie onto a branch or something for stability:
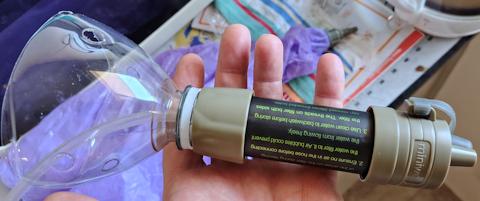
Note, the tubing is silicone, not the normal plastic tubing that you would buy in the local hardware store. using that because of the excellent UV resistance of silicone. Setup, it works great, very fast flow rate:
 |
The thread on both ends of the Miniwell are the same as used in plastic soft-drink bottles, such as Coke. One possibility at the outlet end of the filter, is to screw on soft flexible bottles. These store flat, so pack very compact, and will expand when filled. I've got a few of these, 500ml, for example this one: https://www.aliexpress.com/item/33012014287.html ...the thread is compatible with the Miniwell. Hmmm, I notice that prices of all these items have gone up quite a bit since I purchased a few years ago. Umm, but then comparing with prices in local camping stores, still much cheaper to buy direct from China. Dare I make a political comment: if you live in the USA, your government has found a new way to tax you, by imposing huge tariffs on goods from China. This, I understand, even if there are no alternative sources from "friendly" countries. Just my observation from the outside. Here in Australia, there is only a 10% sales tax, regardless of origin. But AU sells a huge amount of minerals, grains, etc., to China, and we don't want to rock the boat. I've become quite cynical in my old age. The politicians
are saying they are imposing tariffs to encourage local
manufacture, but I see it as a cunning way of raising
taxes. |
Ha ha, I just typed that political comment to fill in the space alongside the photo. Don't send me an email complaining that I don't really understand why goods from China are being taxed. Probably I don't; just my cynical-old-man reaction to what I see and hear on the news media.
Regarding the trike project, here are recent posts:
- Trike test elejoy MPPT controller — December 10, 2024
- Custom recumbent trike first test — December 07, 2024
- Planning to affix solar panel to trike — December 04, 2024
Awhile back, purchased four panniers, and right now figuring out how to pack them. Going through all the camping gear; that's how came across the Miniwell filter. Maybe it will never get used, but if "broken down" in a remote rural region, middle of summer, it could be a life-saver. Well, even if just camping at a site with no potable water, with maybe a dam or pond nearby, then can stay there beyond having used all the bottled water.
EDIT:
Very interesting, Miniwell also sell a sealed filter,
that has a shelf life of 25 years:
https://www.aliexpress.com/item/1005006966050143.html
I read elsewhere, once you start using
it, expect a lifespan of about 3 years. That would be very
variable of course, depending how murky the water is, and how
successful the back-flushing is.
Tags: light
Trike test elejoy MPPT controller
In September, I posted about my collection of MPPT boost controllers:
- MPPT controller for custom trike — September 13, 2024
And further details on the Lensun controller:
- Lensun MPPT has to be isolated from frame — October 11, 2024
Decided to test the elejoy, but left the Lensun in-place, so as to be able to swap them over in just a couple of minutes:
Took the trike outside this morning, December 10, 9.50am, clear blue sky:
As mentioned, had discharged the battery a little bit, hoping to improve the behaviour of the BMS. The elejoy output is reading:
54.3V, 2.35A
Which is 127.6W
Hmmm, not as good as expected. Based upon the surface-area of the panel and inclination of sun, and past experience, I expect higher then that. Need to setup a variable resistive load for the solar panel and find its peak power point; determine what it is actually capable of. Hopefully will do that in the next couple of days.
Today, got distracted when a neighbour came over and we
chatted about the trike, lithium batteries, etc. Then I had other
stuff wanted to do today.
Tags: light
Custom recumbent trike first test
Posted yesterday about planning to put the solar panel onto the trike:
- Planning to affix solar panel to trike — December 04, 2024
Thanks to Bart and Jimmi, who emailed me with advice about adhesives. I tested the Parfix silicone on the back of the solar panel, and also on a piece of aluminium. The bond with the solar panel is incredibly strong, mediocre with the aluminium. I did not degrease nor sandpaper the surface of the aluminium, which would have contributed to the mediocre bond.
However, I decided that the bond to the aluminium is good enough, as it is likely sometime in the future will upgrade the solar panel to a higher wattage. Some adhesives are too good, making removal of the panel just about impossible. Yes, used the Parfix, as that is what already have and as stated, it is "good enough".
As mentioned in the previous post, decided to use aluminium angle to hold the panel down:
Ran a bead of silicone along underneath the panel, before affixing the angle. On reflection, probably that silicone wasn't necessary, just some applied to the internal framework to prevent flapping in a strong breeze. In fact, without silicone might have been better from the point of view of thermal expansion and contraction. Anyway, its done.
Today took it outside for a short test ride. Here it is posing in the courtyard:

Blue sky, about 10am, expected to be getting good output from the solar panel; however, the MPPT controller readings were all over the place. Here is a snapshot:
...see only 65W. Also very disconcerting, sometimes it dropped to
zero amps output for several seconds. I rode the trike around and
around in a circle, and output came up to about 153W.
The battery had been previously charged to 100%, so probably the weirdness out of the MPPT controller is due to the BMS. Hope so amyway. Now it is the evening, and have the battery on discharge, through a 220V inverter powering a 30W incandescent globe. Will let that run for a couple of hours. Tomorrow plan to take the trike outside again and see if the charging has improved. Will also try the elejoy MPPT controller.
The experience of riding the trike around in circles was pleasant. One thing, the front suspension is too soft, but I expected that, and have replacement shock absorbers with stiffer springs; will fit those soon.
A side-project has been started, a throw-over weather protection tent:
...the bottom will have hooks attached, to be pegged to the ground, and there will be more fabric glued onto the sides.
The interesting possibility with this tent is that it could be
more than just weather protection for the trike; if one side is
extended out, it could become a habitable area. Don't know; there
is no vision in the mind how this habitable area could be
achieved. Will just keep contructing it, following my nose. Note,
the fabric is very thin ripstop nylon, left over from years ago
when I was into tent construction.
Tags: light