
How to be safe on a recumbent trike
Continuing a series of posts about recumbent trikes. When you see "bent riders" cycling along, the thought that does come to mind is what will happen if a foot falls off the pedal and hits the ground ...ouch!
Ha ha, recumbent riders refer to themselves as bent riders.
They also refer to the foot falling off onto the road as "leg suck". This video lists 5 safety tips, including how to avoid leg suck:
https://www.youtube.com/watch?v=Tnad_ibvwY8
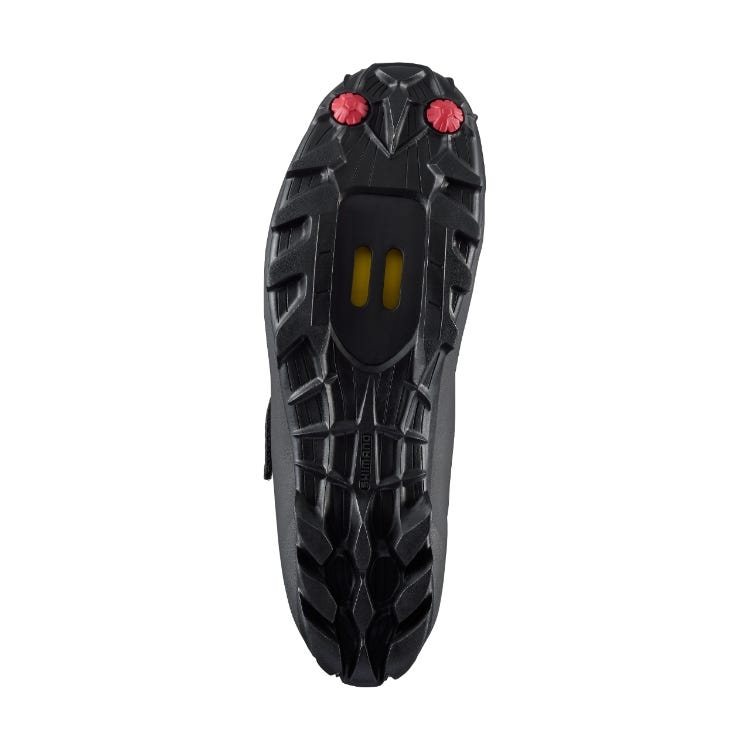
...the other four safety issues can be managed; I think the main concern, for me anyway, is leg suck. It looks like mountain-bike shoes are the way to go. These lock onto the pedal, as this video shows:
https://www.youtube.com/watch?v=0HdO5b2Pu1c
These shoes are readily available. For example, here in Australia, the "99 Bikes" retail chain has lots of them, as well as cleats and pedals. Here is a photo of one of the shoes:
This cleat system also is a huge plus factor for long distance
riding; as the feet are locked onto the pedals, no energy needs to
be expended to keep them there.
Tags: nomad
DIY solar e-bike guides and kit
Fascinating what can be discovered online, when one persists with searching.
I have posted about a solar-powered electric recumbent trike available for purchase:
https://bkhome.org/news/202305/outback-adventure-solar-powered-recumbent-trike.html
Yesterday, posted about recumbent rider groups in Australia:
https://bkhome.org/news/202305/what-kind-of-people-ride-recumbent-trikes.html
One of the members of the Adelaide group has built a solar panel on his recumbent:
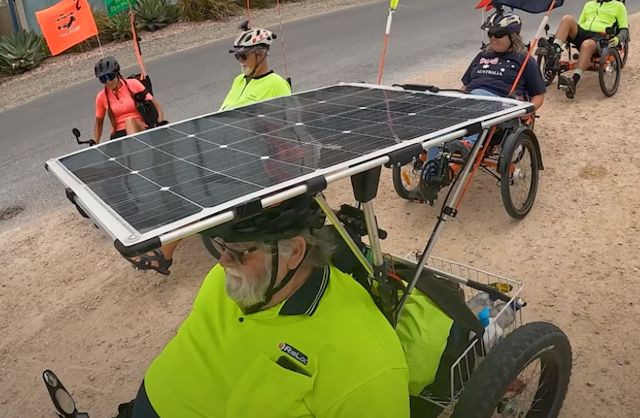
...interesting, it is a quad bike. My understanding is that in WA and
most States, a quad is considered not to be a bicycle and is required
to be registered. Maybe the law in South Australia is different. Or, he
has been able to classify it as a disabled mobility vehicle.
Today, discovered a website that offers a complete kit:
https://ebikes.ca/learn/solar.html
I have posted this link here partly for my own future reference, as
the "learn" section on their website is
fantastic.
Tags: nomad
Car secure window vent
Every year, in Spring-Summer-Autumn, I head off on camping trips, some of which are documented here:
https://bkhome.org/light/index.html
https://bkhome.org/nomad/index.html
The camping equipment includes a Waeco 12V fridge and a lithium "powerbox". Construction of the powerbox is described here:
https://bkhome.org/nomad/barrys-lithium-powerbox.html
I leave the powerbox and fridge in the car, the powerbox sits on the passenger-side foot-well and the fridge on the passenger seat. The car window has to be left slightly ajar for ventilation and cables -- which is a problem. The open window has these issues:
- Mosquitoes get inside the car.
- Rain comes in.
- Not secure.
Two cables, one to the solar panel, the other a 12V power supply into the tent. Inside the tent, I run laptop, lights and fan off the 12V.
There is a chair and table inside the tent, but I often like to sit in the car, and that's when I discover the mosquitoes.
I don't expect much rain in the summer months, but it can happen, so that is another problem.
Go for lots of walks, leaving the car unattended, and although they are really nice people I meet at campsites, there may be a rare someone who is an opportunistic thief. The window opening only needs to be open a little bit, so fairly secure.
I thought, why not, put something together out of the aluminium sheet and extrusions in my shed. OK, this is an experiment. Here it is:
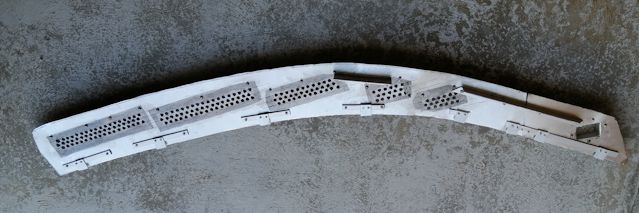
The fibreglass mosquito screening is glued on with silicone sealant. Affixed to the window:
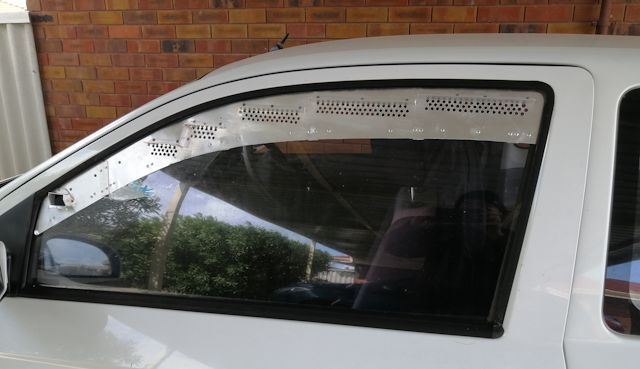
It isn't pretty, but should do the job. Will find out how well, very soon.
I constructed it without much forward planning, learnt a few things along the way. If I did it again, would make some changes:
- Used 0.5mm thick sheet, as that was all I had. About 1mm thick would be better.
- I riveted angle extrusion over the holes, for a modicum of rain protection, but I think a continuous strip of angle the entire length, with notches cut so that it can be bent to follow the curve, would offer better rain protection and rigidity.
- Sliding it over the window would be easier if the overlap was
graduated. The overlap is 10mm, but next time I would cut the
aluminium sheet to say 10mm on the right-side (above photo),
gradually increasing to say 15mm overlap. This would make it
easier to slide on.
Sometime in the future, if this one turns out well on a camping trip, will probably construct another for the driver's side window, so that there is thru-ventilation. I will endeavour to park the car in the shade; however, on hot summer days the car interior will warm up -- which is not so good for the fridge.
Having said that, the Waeco fridge is incredibly efficient and
can easily handle high ambient temperatures.
Keen to go camping!
EDIT 20221006:
Was discussing the window vent with Mark C, and another reason
came up why it may be very useful. Sometimes when driving to the
South Coast of Western Australia from Perth, I don't get all the
way on the same day. It depends which route and which
destination, but many rural towns offer free RV overnight, and I
have used those, sleeping in the car.
Stayed a couple of times at the free overnight site at the little town of Ravensthorpe:
https://www.aircamp.com.au/campsite/ravensthorpe-rest-area

...a nice place. There are toilets over the road. The town centre is just a short stroll away.
Anyway, this is another scenario where the
secure vent is good to have, Keeps out the mozzies and provides
ventilation.
Tags: nomad
Camping at Cozy Corner
I have been on a camping adventure on the South Coast of Western Australia. Stayed at Parry Beach Campsite and Cozy Corner East Campground.
Parry Beach costs AU$20 minimum per night, except the host only charged me $10, as I had a small site. Quite crowded, lots of families, kids everywhere, this is peak summer, school holidays.
Initial impression; lots of mosquitoes.
http://www.findacamp.com.au/camp-site.php?camp=1760
Next, I went to Cozy Corner East Campground. Like Parry Beach, no booking, just turn up, but this one is free. Maximum stay 7 days.
https://www.aussiecaravanninglifestyle.com/cosy-corner-east-free-camp-wa/

Here is a video:
https://www.youtube.com/watch?v=A8zFxCxN0cs
My impressions:
Nice place, you can't beat FREE. There is one downside to the tent-only area, it is just over a sand dune from the ocean, so there is the continual sound of the waves crashing. OK, but a bit too loud if you like quiet to get to sleep.
I did not experience any mosquitos, but there are March Flies -- these bite.
https://www.healthywa.wa.gov.au/Articles/J_M/March-flies
Although it is crowded, the 7-day limit meant a continuous turnover. In the tent-only area, there was nearly always one site available. I observed some people just stayed one night, so if you arrive in the morning there is a good chance of finding a free spot.
Ditto for the caravan camping area. I observed some vehicles at the entrance early in the morning, waiting for people to leave. The Camp Host can help out here, as they have a record of everyone staying, and check with them upon arrive to find out if any spot is scheduled to be vacated.
And then there are those who take off before the allotted 7 days are up. So yeah, even if you have a large RV or caravan, just arrive early in the morning and you have a very good chance of finding a vacant spot. This is peak holiday season, so the situation should be even better off-peak.
No phone signal in my tent, but a short walk to the beach and got
a weak signal. Also, there is a path up a sand dune with weak
signal at the top. I am with Vodafone.
Tags: nomad
Stealth camping
Here in Australia, there is a growing trend of people in
campervans "free camping", illegally or otherwise. Many shires on the
East Coast are getting quite aggressive about this, imposing large
fines. But it still goes on, and there are websites with guidelines on
how and where to park. Like, for example, make your van look like a
tradesman's van rather than a campervan.
But stealth camping can also apply to those just on their feet. Homeless people of course.
Many years ago, while travelling by car, bus or train in urban areas,
I had the habit of spotting places where I thought someone could camp
overnight without being seen. Don't do that anymore, but I was surprised
to read that others also have that habit:
https://bushwalk.com/forum/viewtopic.php?p=173814#p173814
There are some YouTube videos with guidelines to stealth camping on
the foot. I recall, a couple of them advised that you need to look like
you are just out for a day walk. A lumbar pack or small shoulder pack,
but not a big backpack with tent poles strapped to it!
There are a lot of bush trails east of Perth without designated
overnight camping, for example the track from Mundaring to Northam. I am
sure that many people just camp discretely, leaving no trace.
There is also an attraction to stealth camping -- security. On a
trail, if you find a spot off the trail, you can easily select a place
where no one is likely to see you. As opposed to staying at a designated
overnight shelter, where everyone on the track will see you.
If you search for "stealth camping" at YouTube, you will find heaps of hits. Here are a couple from Steve:
https://www.youtube.com/watch?v=Qhf88k9MRZM
https://www.youtube.com/watch?v=54H0aYgS6wo
Tags: nomad
Day 55 end of Perth to Albany walk
I posted about Caroline walking the Bibbulmun Track, from Kalamunda in Perth to Albany on the south coast.
After completing the walk, she and her cameraman Steve have been
putting the videos together, and finally, today, uploaded episode 17,
day 55, when they reach Albany.
Here is my blog post at start of journey:
https://bkhome.org/news/202103/young-ladies-walking-solo-on-the-bibbulmun-track.html
She was solo for a couple of days near the beginning, as Steve had to
drop out for medical reasons. Then again he had to drop out the last
couple of days. He rejoined for about the final 10km walk into Albany,
and if you watch that final video, you will see the camera work changes
with Steve's unannounced presence:
https://www.youtube.com/watch?v=Gh3gsy57qWI

Fantastic to watch. Don't know if I will ever do the entire 1,000km, but certainly love doing bits of it.
Tags: nomad
Young ladies walking solo on the Bibbulmun Track
These are nice presentations. Walking solo on a multi-day hike is
as much a mental journey as a physical one, and it is interesting how
each person adapts to the walk.
Caroline starts with a partner to do the filming, but soon finds
herself solo. This is interesting, as she is a person who likes company,
and suddenly finding herself alone was a challenge mentally. Here is
the first part of the journey:
https://www.youtube.com/watch?v=kwT6XQJ9N8A
...Caroline walked the entire 1,000km, and has posted videos of the entire journey.
Dori is someone who is at home with herself, who prefers solo hiking.
It does require some mental adjustment though, especially the feeling
of being vulnerable. She posted a video about this:
https://www.youtube.com/watch?v=R7SQD3jnQgQ
And here is the first post on her journey heading southward on the Bibbulmun Track:
https://www.youtube.com/watch?v=h_05N58qoWE
She only posted that on March 14, 2021, and has posted the first and second videos so far.
People walk solo for all kinds of reasons. The two young lasses
above, liked to meet people along the way. Some are loners, just like to
be to themselves.
Just remembered, I met a lass who seems to be a professional solo
hiker, trail-name "Drop Bear", at Hewitt's Hill Campsite, in 2016. If I
recall rightly, she was just starting on the journey, heading south.
Found a page about her:
https://thetrek.co/arizona-rocks/20180412_123802/
Yes, she walked end-to-end, and is in the "End-to-Enders Gallery":
https://www.bibbulmuntrack.org.au/news/end-to-enders-gallery/e2e/53106#
Interesting choice of lifestyle.
Tags: nomad
A hike around Lake Walyungup
The State of Western Australia is in a fortunate situation, as it
is coronavirus-free. The only cases are those of returning
international travellers, and they get isolated for two weeks. As far as
the rest of Australia is concerned, unfortunately, Victoria has let the
country down, with many new cases every day -- which was caused by
incompetent isolation of returning international travellers -- it was
mostly the security guards, apparently, who were responsible for
spreading the virus from the isolation-hotels to the wider community.
Anyway, here in WA, we have had competent handling of the crisis, and
we are just about back to normal. I am getting around on public
transport and going to favourite restaurants. Today, went for a hike,
before some lunch and shopping...
While considering where to hike in the Rockingham-Warnbro area of WA, I stumbled across "metrotrekker" Marc's website:
https://www.metrotrekker.com/search?country=All_Countries&city=All_Cities
Marc hikes in metropolitan, or outer-metropolitan, areas, accessable
at each terminus by public transport. He has hiked in Europe, Japan,
Singapore and Australia. I wanted to walk around Lake Walyungup, and
found that he has done that:
https://www.metrotrekker.com/australia-perth-hiking-a-walk-on-lake-walyungup
I drove there, but if you come by public transport from Perth, take
the Mandurah Line and get off at Warnbro Station. This is about 37
minutes train journey. Walk East from the station, along Safety Bay
Road, not far, and you will see a parking spot on the right, and a very
small one on the left. On the south side, there is an entry gate to the
lake:
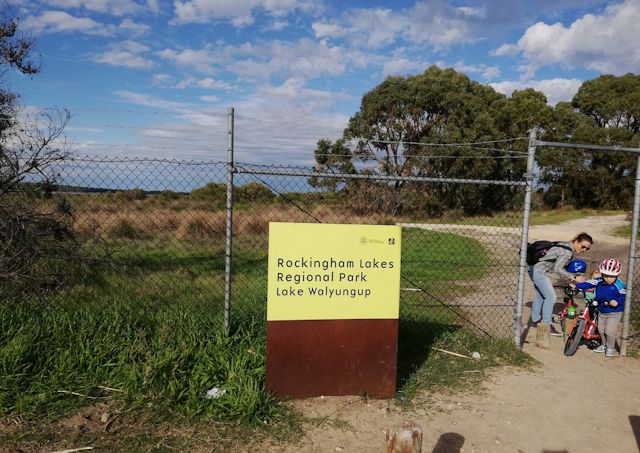
...the time is about 10.00am, on Sunday, July 5, 2020 (mid-winter),
and there were several cars parked, so other hikers were encountered.
What's so special about this lake? Nothing in particular. Perth is
located on a coastal sandplain, so that is the kind of terrain, sand and
limestone. South of Perth City, the suburbs have sprawled right down to
Mandurah and beyond, and there is a metro train line that terminates at
Mandurah, running through Rockingham and Warnbro.
There is a military base on Garden Island, close to the coast just
north of Rockingham, and they used Lake Walyungup for target practise,
and I saw the warning:
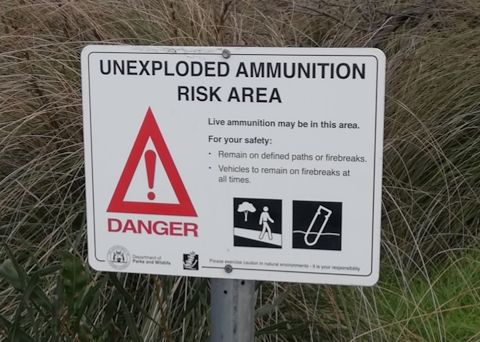
No longer of course! As to footpaths, there are some, but it is mostly a huge expanse of flat sand and limestone:
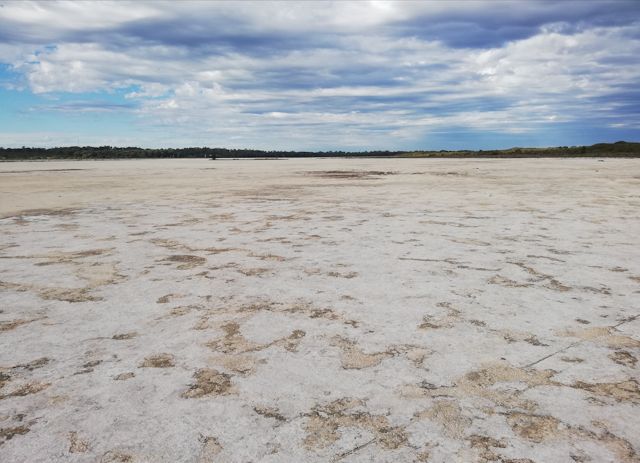
...there isn't much water, and the ground is firm, as it is limestone sprinkled with sand.
Google map shows lots of water, but it is in actuality much less. I
walked south, on the west side of the lake, then cut across east, and
walked back on the east side of the lake. It seems that there are two
bodies of water, so walking south from the entrance, one can walk east
across the land that separates the two bodies.
I then walked north along the east side of the lake, and took a photo to prove that there is still some water here:
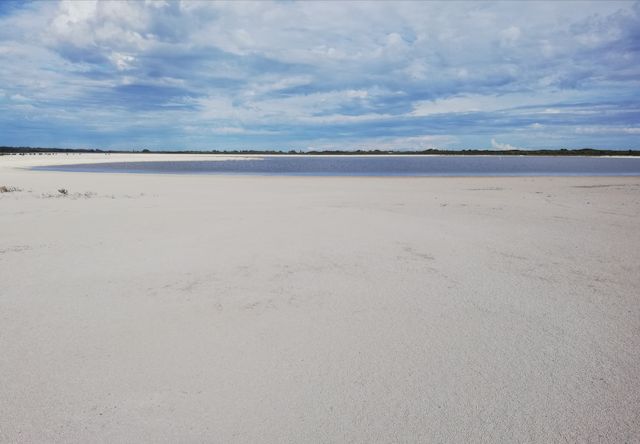
I ambled about a bit, and the walk took about 2 hours. If someone
walked closer to the water, the walk around it and back to the car park,
would be about 1.5 hours, maybe less.
A pleasant walk, no spectacular scenic features, but of interest to observe the type of terrain and plants.
Stealing Marc's map of where he walked:
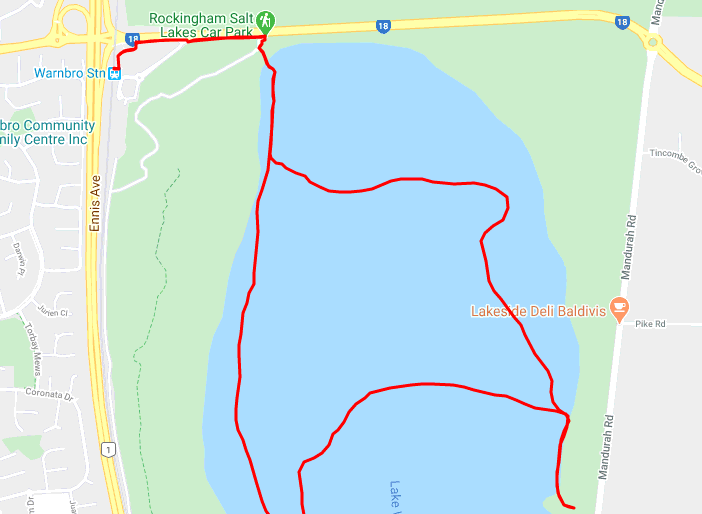
...in my case, I walked down the west side of the lake, until I saw
that Lakeside Deli directly east, then walked across. I could not see
any access to the deli, nothing easy anyway. Instead, I went back to my
car and drove to the nearby Waikiki Shopping Centre and bought a Jesters
pie and chips for lunch -- hey, there is a lot to be said in favour of
urban trekking!
Tags: nomad